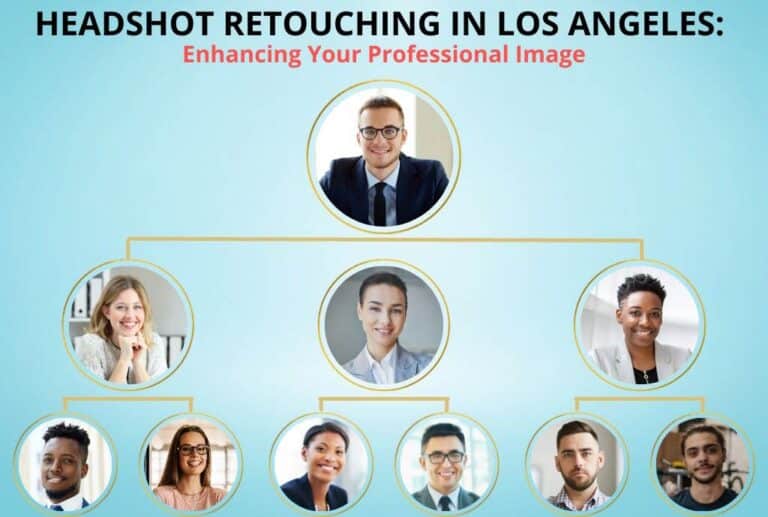
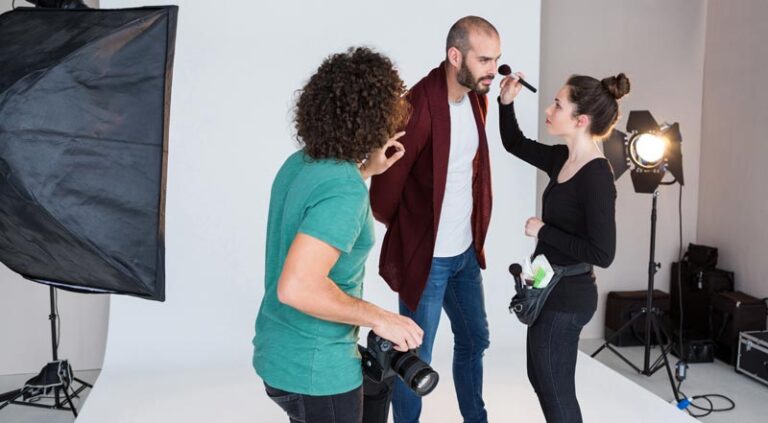
Art of Headshot Editing: Headshot Editor Guides
Introduction
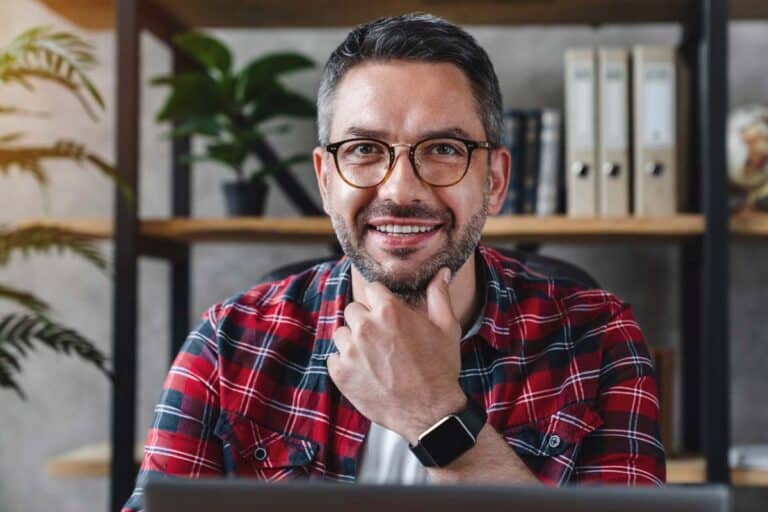
Headshots are professional portraits that are used to represent a person’s image in the public eye. They are often used on websites, social media, and in print materials. Headshots can be used for a variety of purposes, including:
- Promoting your business or career. Headshots can help you to build your personal brand and connect with potential clients or employers.
- Representing yourself in a professional setting. Headshots can be used on your resume, LinkedIn profile, or in other professional communications.
- Promoting your creative work. Headshots can be used to promote your acting, modeling, or other creative work.
Importance of Headshots in Various Industries
Whether you’re a business owner, a professional, or a student, having a professional headshot can be a valuable asset. It can help you to build trust, rapport, and credibility, and it can promote your brand. If you’re looking for a way to improve your professional image, consider getting a headshot done.:
- Business: Headshots are often used on corporate websites and in marketing materials to help people connect with the company’s employees.
- Education: Headshots are often used on college and university websites to help students and prospective students get to know the faculty.
- Healthcare: Headshots are often used on medical websites and in marketing materials to help patients connect with their doctors and other healthcare providers.
- Law: Headshots are often used on law firm websites and in marketing materials to help clients get to know their lawyers.
- Other industries: Headshots can be used in a variety of other industries, including the arts, entertainment, and government.
The Role of Headshot Editors in Enhancing Professional Images
Headshot editors play an important role in enhancing professional images. They use their skills and experience to remove imperfections, improve lighting, and make the overall image more polished. This can help to create a more professional and confident appearance, which can be beneficial in a variety of settings, such as job interviews, networking events, and online profiles. Headshot editors can help to enhance professional images by:
- Correcting lighting and exposure. Headshot editors can use their skills to ensure that your headshot is well-lit and exposed.
- Removing blemishes and imperfections. Headshot editors can use their skills to remove blemishes and other imperfections from your skin.
- Retouching your hair and makeup. Headshot editors can use their skills to retouch your hair and makeup to make you look your best.
- Cropping and resizing your image. Headshot editors can crop and resize your image to fit the specific requirements of your website, social media profile, or print material.
Understanding Headshot Editing
There are a number of reasons why headshot editing is important. First, it can help to ensure that your headshot looks its best. This is important because your headshot is often the first impression that people will have of you. Second, headshot editing can help to make your headshot more professional and polished.
A. What is Headshot Editing?
Headshot editing is the process of enhancing a headshot photograph to make it look its best. This can involve a variety of techniques, such as:
- Correcting lighting and exposure. This can involve adjusting the brightness, contrast, and shadows in the image.
- Removing blemishes and imperfections. This can involve using tools to remove acne, wrinkles, and other skin imperfections.
- Retouching hair and makeup. This can involve making hair look smoother and makeup look more natural.
- Cropping and resizing. This can involve cropping the image to a specific size or format, or resizing it to fit a specific space.
B. Common Techniques and Tools Used in Headshot Editing
There are a variety of techniques and tools that can be used to edit headshots. Some of the most common techniques include:
- Lighting: The lighting in a headshot can have a big impact on the overall look of the image. Headshot editors often use tools to adjust the brightness, contrast, and shadows in the image to create a more flattering look.
- Color: The color in a headshot can also be enhanced using editing tools. Headshot editors can adjust the saturation, hue, and brightness of the colors in the image to create a more vibrant or muted look.
- Skin: The skin in a headshot can be smoothed and blemishes can be removed using editing tools. This can help to create a more polished and professional look.
- Hair and makeup: Hair and makeup can also be enhanced using editing tools. Headshot editors can smooth hair, add volume, and remove blemishes to create a more polished look.
C. Key Considerations for Effective Headshot Editing
There are a few key considerations to keep in mind when editing headshots:
- Naturalness: The goal of headshot editing should be to enhance the natural beauty of the subject, not to create a completely unrealistic look.
- Purpose: The purpose of the headshot should be considered when editing. For example, a headshot for a business website will need to be more formal than a headshot for a social media profile.
- Client’s preferences: The client’s preferences should also be considered when editing. Some clients may prefer a more natural look, while others may prefer a more stylized look.
Preparing for Headshot Editing
A. Selecting the Right Software and Tools
There are a variety of software and tools that can be used to edit headshots. Some of the most popular options include:
- Adobe Photoshop: Photoshop is a comprehensive image editing software that offers a wide range of tools for editing headshots.
- Adobe Lightroom: Lightroom is a photo management software that can also be used to edit headshots. It is a good option for photographers who want to edit a large number of headshots quickly.
- GIMP: GIMP is a free and open-source image editing software that offers many of the same features as Photoshop.
B. Setting Up a Proper Editing Environment
Once you have selected the right software and tools, you need to set up a proper editing environment. This means having a comfortable workspace with a good computer and monitor. You should also have a backup plan in case your computer crashes or your files are lost.
C. Organizing and Managing Headshot Files
It is important to organize and manage your headshot files so that you can easily find the files you need. You can use a file naming convention to organize your files, or you can use a photo management software like Lightroom to help you keep track of your files.
Technical Aspects of Headshot Editing
When editing headshots, it is important to be subtle and to avoid making any major changes that would make the photo look unnatural. The goal of headshot editing is to enhance the subject’s natural beauty and to create a photo that is professional and polished.
A. Basic Retouching Techniques
- Skin retouching: This involves smoothing out the skin and removing blemishes. This can be done using a variety of tools, such as the Clone Stamp Tool, the Healing Brush Tool, and the Spot Healing Brush Tool.
- Blemish removal: This involves removing blemishes, such as acne, wrinkles, and scars. This can be done using the same tools as skin retouching.
- Color correction: This involves adjusting the colors in the image to make them more accurate or to create a specific mood. This can be done using the Levels Tool, the Curves Tool, and the Color Balance Tool.
- Eye enhancement: This involves making the eyes look brighter and more vibrant. This can be done using the Dodge Tool and the Burn Tool.
- Teeth whitening: This involves making the teeth look whiter. This can be done using the Color Range Tool and the Dodge Tool.
B. Advanced Retouching Techniques
- Facial feature adjustments: This involves adjusting the size and shape of the facial features, such as the nose, lips, and eyes. This can be done using the Liquify Tool.
- Hair retouching and styling: This involves making the hair look smoother and more styled. This can be done using the Clone Stamp Tool, the Healing Brush Tool, and the Burn Tool.
- Body contouring and slimming: This involves making the body look slimmer and more toned. This can be done using the Liquify Tool and the Burn Tool.
- Clothing and accessory enhancements: This involves making the clothing and accessories look more polished and professional. This can be done using the Dodge Tool and the Burn Tool.
C. Background Editing and Replacement
- Background editing: This involves adjusting the background of the image, such as removing distractions or adding a new background. This can be done using the Clone Stamp Tool, the Healing Brush Tool, and the Magic Eraser Tool.
- Background replacement: This involves replacing the background of the image with a new background. This can be done using the Content-Aware Fill Tool or by manually cutting and pasting the background.
Achieving Natural-Looking Results
A. Maintaining Realistic Skin Texture
When retouching skin, it is important to maintain realistic skin texture. This means avoiding over-smoothing the skin, as this can make the subject look unnatural. You can use the Clone Stamp Tool or the Healing Brush Tool to remove blemishes and imperfections, but you should avoid using the Liquify Tool or other tools that can distort the skin texture.
B. Retaining Natural Facial Expressions
When retouching a headshot, it is important to retain the subject’s natural facial expressions. This means avoiding over-smoothing the skin or making any other changes that would alter the subject’s appearance. You should only make subtle changes to the image, such as adjusting the brightness, contrast, and color.
C. Balancing the Use of Retouching Techniques
It is important to balance the use of retouching techniques in a headshot. This means using enough retouching to make the subject look their best, but not so much retouching that the subject looks unnatural. You should use your judgment to decide how much retouching is appropriate for each headshot.
Customizing Headshot Editing for Different Industries
Headshot editing is the process of enhancing and improving a headshot photograph. The specific editing techniques that are used will vary depending on the industry in which the headshot will be used. Headshots for the corporate world will typically be more formal and understated. This means that the editing will be more subtle, with a focus on making the subject look professional and polished. On the other hand, headshots for the entertainment industry may be more creative and stylized. This means that the editing may be more dramatic, with a focus on making the subject look glamorous or edgy.
A. Corporate Headshots
- Guidelines for corporate headshot editing:
- Emphasize professionalism and approachability. The goal of a corporate headshot is to present the subject in a professional and approachable light. This means avoiding any distracting or unprofessional elements in the image.
- Use subtle retouching techniques. When editing corporate headshots, it is important to use subtle retouching techniques. This means avoiding over-smoothing the skin or making any other changes that would alter the subject’s appearance.
- Keep the background simple. The background of a corporate headshot should be simple and uncluttered. This will help to keep the focus on the subject.
- Emphasize professionalism and approachability. The goal of a corporate headshot is to present the subject in a professional and approachable light. This means avoiding any distracting or unprofessional elements in the image.
- Emphasizing professionalism and approachability:
- Use neutral colors and tones. Neutral colors and tones will create a professional and polished look.
- Avoid using props or accessories. Props and accessories can be distracting in a corporate headshot.
- Make eye contact with the camera. Making eye contact with the camera will create a sense of connection and engagement.
B. Model and Actor Headshots
- Highlighting unique features and expressions:
- Pay attention to the subject’s unique features. What makes the subject stand out from the crowd? Highlight these features in the headshot.
- Capture a variety of expressions. A good model or actor headshot should capture a variety of expressions, from serious to playful. This will show the subject’s range and versatility.
- Creating diverse looks and moods:
- Experiment with different lighting and styling. Different lighting and styling can create different looks and moods. Experiment until you find a look that the subject feels comfortable with and that represents their personality.
- Use Photoshop to create special effects. Photoshop can be used to create special effects, such as adding a vintage or cinematic look. This can help to make the headshot more unique and eye-catching.
C. Headshots for Online Profiles and Social Media
- Optimizing headshots for specific platforms:
- Choose the right size and format. The size and format of the headshot will vary depending on the platform where it will be used. For example, a headshot for LinkedIn should be a square image, while a headshot for Twitter should be a vertical image.
- Use high-quality images. The images should be high-quality and clear. This will help the headshot to stand out on the platform.
- Enhancing personal branding and online presence:
- Choose a headshot that represents your personal brand. The headshot should reflect your personality and your professional goals.
- Use the headshot to connect with potential clients or employers. The headshot should be a way for potential clients or employers to get to know you and your work.
Workflow and Efficiency Tips
A. Developing an Efficient Editing Workflow
- Start by defining your goals. What do you want to achieve with your headshot editing? Once you know your goals, you can start to develop a workflow that will help you to achieve them.
- Organize your files. This will help you to find the files you need quickly and easily. You can use a file naming convention or a photo management software to help you organize your files.
- Use presets and templates. This can save you a lot of time, as you will not have to make the same adjustments to each image.
- Batch edit. This is a great way to save time when editing multiple images. You can use batch editing to make the same adjustments to a group of images at the same time.
B. Batch Editing Techniques and Shortcuts
- Use keyboard shortcuts. This can save you a lot of time when editing images. There are many keyboard shortcuts available for different editing tasks.
- Use the History panel. This can help you to undo any changes you make to an image. This is a great way to experiment with different editing techniques without having to worry about making permanent changes to the image.
- Use the Zoom tool. This can help you to zoom in on specific areas of an image. This is a great way to make precise adjustments to an image.
C. Time-Saving Tips for Faster Turnaround
- Set realistic expectations. It takes time to edit headshots, so don’t expect to be able to turn around a batch of images overnight.
- Delegate tasks. If you have the resources, you can delegate some of the editing tasks to others. This can free up your time so that you can focus on the more important tasks.
- Automate tasks. There are a number of software programs that can automate some of the editing tasks. This can save you a lot of time.
Ethical Considerations in Headshot Editing
One of the most important ethical considerations is to be honest with the client about the extent of the editing that has been done. If you are making significant changes to the person’s appearance, it is important to get their permission first. Additionally, you should avoid making changes that are unrealistic or that could create unrealistic expectations for others.
A. Avoiding Excessive Retouching
It is important to avoid excessive retouching when editing headshots. This means avoiding making changes that would alter the subject’s appearance in a significant way. For example, you should avoid using the Liquify Tool to change the shape of the subject’s face or body. You should also avoid using the Clone Stamp Tool to remove blemishes or other imperfections that are not distracting or unsightly.
B. Respecting the Subject’s Identity and Natural Appearance
When editing headshots, it is important to respect the subject’s identity and natural appearance. This means not making changes that would make the subject look unrecognizable or that would create an unrealistic expectation of their appearance. For example, you should not make the subject’s skin look unnaturally smooth or their eyes look unnaturally large.
C. Communicating with Clients about Editing Boundaries
It is important to communicate with clients about editing boundaries before you start editing their headshots. This means discussing what changes you are willing to make and what changes you are not willing to make. It is also important to discuss the client’s expectations for the final product. By communicating with clients about editing boundaries, you can avoid any misunderstandings or disappointments.
Tips for Working with Clients
Working with clients can be a rewarding experience, but it can also be challenging. It’s important to establish clear expectations, communicate effectively, and build trust in order to create a successful client relationship. Here are some tips for working with clients when editing headshots:
A. Understanding Client Expectations and Goals
The first step in working with clients is to understand their expectations and goals for the headshots. What do they want to achieve with the headshots? What are their budget and timeline constraints? Once you understand the client’s expectations, you can start to develop a plan for the editing process.
B. Communication and Collaboration During the Editing Process
It is important to communicate and collaborate with clients throughout the editing process. This means keeping them updated on your progress and getting their feedback on the edited headshots. It is also important to be open to their suggestions and to be willing to make changes if necessary.
C. Delivering the Final Edited Headshots
Once you are finished editing the headshots, it is important to deliver them to the client in a timely manner. You should also provide the client with instructions on how to use the headshots.
See our
#1 Best Professional Headshot Retouching
Frequently Asked Questions (FAQs)
Q. What equipment and software are recommended for headshot editing?
A. The best equipment and software for headshot editing will vary depending on your budget and needs. However, some of the most popular software options include Adobe Photoshop, Adobe Lightroom, and GIMP. These software programs offer a wide range of editing tools that can be used to improve the look of headshots.
In terms of equipment, a good quality computer with a powerful processor and a large monitor will be essential for editing headshots. You may also want to invest in a high-quality graphics tablet, which can make it easier to edit images precisely.
Q. How can I effectively remove blemishes without making the skin look unnatural?
A. There are a few different ways to remove blemishes without making the skin look unnatural. One way is to use the Clone Stamp Tool to copy unblemished areas of skin over the blemishes. Another way is to use the Healing Brush Tool to blend the blemishes into the surrounding skin. You can also use the Spot Healing Brush Tool to remove individual blemishes.
Q. What are some common mistakes to avoid in headshot editing?
A. Some common mistakes to avoid in headshot editing include:
- Over-retouching. This can make the subject look unnatural and unrealistic.
- Changing the subject’s appearance in a significant way. This can be unethical and misleading.
- Not paying attention to the details. This can make the headshot look amateurish.
- Not using a consistent style. This can make the headshot look disjointed and unprofessional.
Q. How do I maintain a consistent style across a series of headshots?
A. There are a few things you can do to maintain a consistent style across a series of headshots:
- Use the same editing tools and techniques.
- **Choose the same colors and tones.
- **Use the same background.
- **Maintain the same cropping and sizing.
Q. Can I edit headshots taken with a smartphone?
A. Yes, you can edit headshots taken with a smartphone. However, you may need to use a different editing software than you would use for headshots taken with a DSLR camera. Some of the best editing software options for smartphone headshots include Snapseed, VSCO, and Adobe Lightroom Mobile.
Q. What are some best practices for retouching hair in headshots?
A. Some best practices for retouching hair in headshots include:
- Remove any flyaways or stray hairs.
- Smooth out the hair texture.
- Add highlights and shadows to create depth.
- Adjust the color of the hair to match the subject’s natural hair color.
Q. How do I choose the right background for a headshot?
A. The right background for a headshot will depend on the subject’s profession and the purpose of the headshot. However, some general tips for choosing a background include:
- Choose a background that is simple and uncluttered.
- **Choose a background that is complementary to the subject’s clothing.
- **Choose a background that is appropriate for the subject’s profession.
Q. Is it ethical to retouch headshots for job applications?
A. There is no one-size-fits-all answer to this question. However, it is generally considered ethical to retouch headshots for job applications as long as the retouching is subtle and does not change the subject’s appearance in a significant way.
Q. How can I enhance facial expressions without making them look exaggerated?
A. There are a few ways to enhance facial expressions without making them look exaggerated:
- Use the Dodge Tool and Burn Tool to add highlights and shadows to the face.
- **Use the Color Range Tool to select specific areas of the face and adjust the color or brightness.
- **Use the Liquify Tool to make subtle adjustments to the shape of the face.
Q. How do I handle client feedback and revisions?
A. It is important to be respectful of client feedback and revisions when editing headshots. If a client is not happy with the way a headshot looks, it is important to listen to their feedback and make the necessary changes. However, it is also important to set boundaries and to explain to the client that you cannot make changes that would alter their appearance in a significant way.
Conclusion
Here is a recap of the key points discussed in the article and an encouragement to master headshot editing skills:
- Headshot editing is the process of enhancing a headshot photograph to make it look its best.
- There are a variety of techniques and tools that can be used to edit headshots, including skin retouching, color correction, and background editing.
- It is important to use subtle retouching techniques and to respect the subject’s identity and natural appearance when editing headshots.
- It is also important to communicate with clients about editing boundaries and to be respectful of client feedback and revisions.
Headshot editing is a valuable skill that can help you to create professional-looking headshots that will help you to achieve your personal and professional goals. By following the tips and techniques discussed in this article, you can master headshot editing skills and create stunning headshots that will make a positive impression.

