
Mobile Product Photography Tips for Ecommerce Sellers
If you run an online store, your product photos do a huge chunk of the selling for you. Customers cannot touch, test, or inspect your item in person, so your images have to answer questions, build trust, and make the product feel worth buying.
The good news: you do not need a fancy DSLR to get there.
With the right setup, a modern smartphone can produce sharp, clean, marketplace-ready images. That makes mobile product photography tips for ecommerce sellers especially useful for small business owners, Shopify brands, Etsy sellers, and Amazon merchants who want better visuals without a giant studio budget. Shopify’s current product photography guidance also emphasizes that strong product photos come down to setup, lighting, and consistency, not just expensive gear.
In this guide, you’ll learn how to shoot better product photos with your phone, avoid the mistakes that make listings look amateur, and know when editing support can help you move faster.
Why Mobile Product Photography Matters for Ecommerce
Smartphone photography has become a practical option for ecommerce because it is fast, affordable, and flexible. You can shoot, review, retake, and prep images in one workflow without moving files through a complicated studio setup. That is a big deal for small brands trying to launch new SKUs quickly or refresh seasonal listings. The original Photo Fix Team article also positions mobile photography as a budget-friendly way for sellers to create conversion-focused product imagery.
Better product photos can help you:
- make listings look more trustworthy
- show size, texture, and color more clearly
- create a more consistent brand experience
- reduce confusion before purchase
- prepare images that fit marketplace requirements
Google Merchant Center, for example, recommends providing high-quality product images and notes that low image quality can trigger issues in Merchant Center. It also recommends images near or above 1500 x 1500 pixels for strong performance across listing formats.
That means your phone photos do not just need to look nice. They need to be clear, accurate, and technically usable.
What You Need Before You Start Shooting
You can keep this simple. For most ecommerce sellers, a small repeatable setup beats expensive gear you barely use.
Basic gear that actually helps
Start with:
- a smartphone with a good rear camera
- a tripod or phone stand
- a plain white, gray, or brand-friendly backdrop
- natural window light or a basic continuous light
- a reflector or white foam board
- a cleaning cloth for the lens
A stable setup matters because blur, shadows, and inconsistency make products look low value fast. Shopify’s photography guide also stresses the importance of controlled lighting and a clean setup for better ecommerce images.
Build a simple shooting space
You do not need a professional studio. A table near a large window works for many products. Use the same surface, same background, and similar lighting angle every time. That creates consistency across your catalog, which matters a lot when customers browse multiple products on a collection page.
[Internal Link Suggestion: product photography tips and guides -> /category/product-photography/]
12 Mobile Product Photography Tips for Ecommerce Sellers
1) Clean your phone lens first
This sounds tiny, but it is the easiest win on the list.
Phone lenses pick up fingerprints, dust, and pocket grime all day. If your photos look hazy or soft, the lens may be the problem, not the camera. Wipe it with a microfiber cloth before every session.
2) Use soft, even lighting
Lighting is everything in smartphone product photography.
Natural light from a window is often the best place to start. Shoot near the window, but avoid direct harsh sunlight that creates strong shadows or blown-out highlights. If you need more control, use a softbox, light tent, or diffused LED light.
The goal is simple: make the product easy to see and true to life.
For white background product photos, even lighting matters even more. Uneven light can turn a clean background gray, yellow, or shadowy. Shopify product photography guide
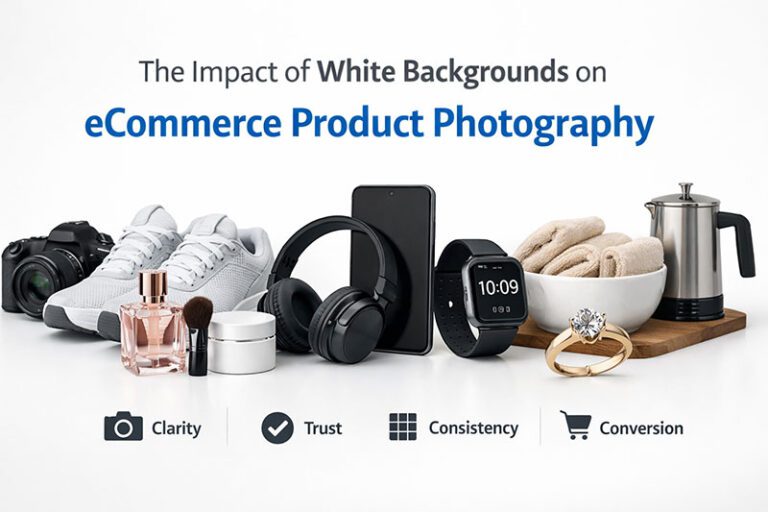
3) Pick a background that keeps focus on the product
For marketplaces and many ecommerce layouts, simple backgrounds usually win.
A white background is often safest for main images because it looks clean and helps the product stand out. It is also aligned with many marketplace expectations. Google Merchant Center’s editorial and professional standards emphasize clear, professional product imagery, and Google can even flag image-quality issues when visuals are weak.
Use lifestyle backgrounds for secondary images, not for every shot.
Good rule:
- main image = clean and distraction-free
- extra images = contextual, styled, or in-use
4) Stabilize your phone every time
Handheld shots may be okay for social content, but not for ecommerce product pages.
Use a tripod, clamp, or stand so your framing stays consistent across products. Stabilizing your phone helps with sharpness and makes it easier to repeat angles for different colors, sizes, or variations.
This is one of the most useful product photography lighting tips too, because once your camera is fixed, you can adjust the lights without changing composition.
5) Lock focus and exposure
Most phone cameras try to auto-correct the scene. That sounds helpful, but it often creates inconsistent results between shots.
Tap your product to focus, then lock focus and exposure if your phone allows it. This helps keep color, brightness, and detail more stable across the full image set.
That matters a lot if you sell clothing, accessories, cosmetics, home goods, or handmade products where texture and color influence purchase decisions.
6) Shoot more than one angle
One hero image is not enough.
Customers want to understand what they are buying, so include:
- front view
- side view
- back view
- top or angled view
- packaging shot if relevant
- scale shot if size may be unclear
Multiple angles help make your product photos for online store listings feel more complete and reduce uncertainty.
7) Add close-ups for texture and details
If your product has stitching, grain, hardware, labels, or material texture, show it.
Close-up shots help buyers judge quality. For fashion, beauty, jewelry, and handmade products, detail shots can be the difference between “maybe” and “add to cart.”
Just be careful not to overdo digital zoom. Move the phone physically closer when possible, or crop a high-resolution image during editing.
8) Style the scene, but do not clutter it
Props can help tell a story. They can also ruin the shot.
Use props only when they support the product. A skincare bottle might benefit from a towel and clean bathroom setting. A coffee mug may look better near beans or a breakfast scene. But if the prop competes for attention, cut it.
For ecommerce, clarity beats creativity most of the time.
9) Keep framing and proportions consistent
Consistency makes your store look more premium.
Try to keep:
- the same crop ratio
- similar product size within the frame
- a repeatable angle for hero shots
- matching brightness and white balance
This is especially important for collection pages and category grids. A messy mix of framing styles makes the store feel less professional, even if each photo is okay on its own.
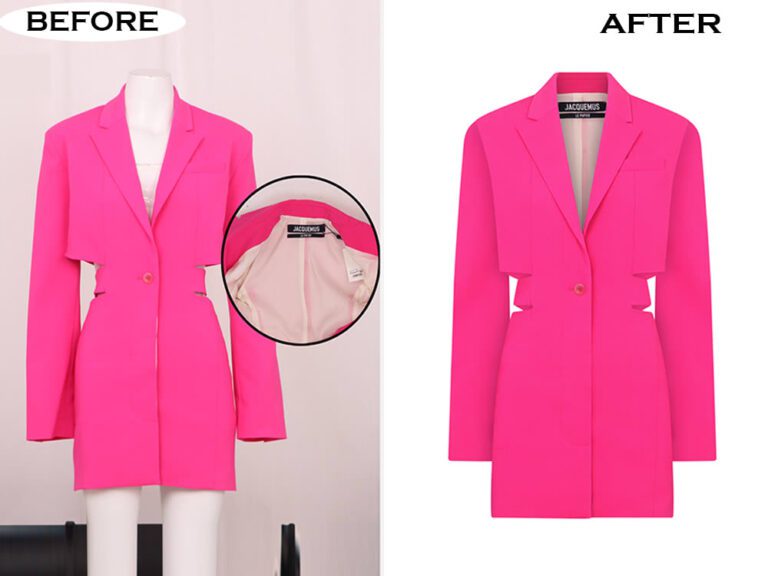
10) Edit for accuracy, not gimmicks
Editing is where a decent phone photo becomes polished.
For ecommerce, focus on:
- background cleanup
- brightness and contrast correction
- straightening
- color correction
- dust, scratch, or blemish cleanup
- consistent cropping
- shadow refinement
Do not oversaturate or heavily filter the product. Customers need the item to look real. Over-editing can lead to disappointment and returns.
Google Merchant Center also emphasizes professional, accurate presentation in product imagery, which is another reason realistic editing matters.
11) Resize and prep images for where they will be used
Your website, Google listings, and marketplaces do not always want the exact same thing.
Google Merchant Center recommends high-resolution images, ideally near or above 1500 x 1500 pixels for strong performance.
That means your workflow should include:
- exporting high-res master files
- saving web-friendly versions
- checking aspect ratios for your store theme
- reviewing platform-specific image rules before upload
12) Create a repeatable shot list and workflow
The real secret is not taking one great photo. It is being able to do it again and again.
Create a checklist for every SKU:
- clean product
- clean lens
- set backdrop
- set lights
- front angle
- side angles
- detail shots
- scale or in-use shot
- edit and export
- name files consistently
This saves time and helps your brand stay visually consistent as your catalog grows.
Common Mistakes That Make Product Images Look Cheap
Here are the big ones:
Bad lighting
Too dark, too yellow, too harsh, or too shadowy.
Busy backgrounds
If the eye goes to the background before the product, the image is not doing its job.
Inconsistent editing
Different white balances, crops, and shadows make your catalog look stitched together.
Soft or blurry images
Usually caused by poor light, shaky hands, or a dirty lens.
Misleading color
If the item arrives looking different from the photo, trust drops fast.
Not enough image variety
One image rarely answers every buyer question.
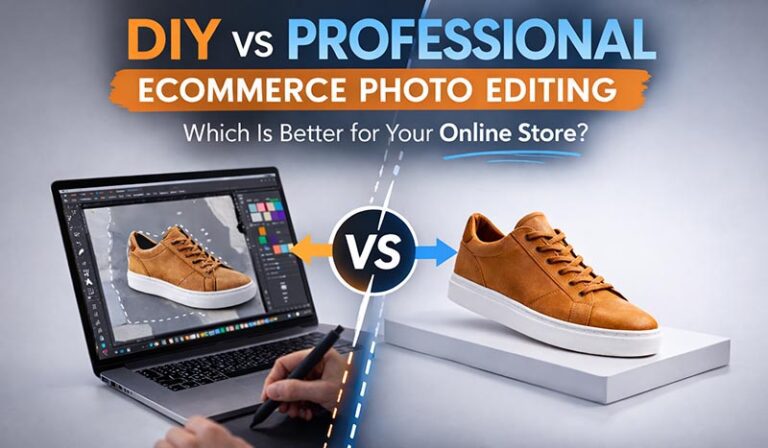
When It Makes Sense to Outsource Editing
DIY shooting is smart. DIY editing for every single product, every single week? That gets messy.
If you are dealing with large product batches, strict marketplace standards, or brand consistency issues, outsourcing ecommerce photo editing can save serious time.
A professional product image editing service can help with:
- pure white background conversion
- color consistency across product lines
- retouching dust, wrinkles, and minor flaws
- shadow creation or cleanup
- bulk image processing
- preparing marketplace-ready product images faster
Photo Fix Team’s ecommerce editing pages position this kind of service around cleaner, more consistent, conversion-focused product images for sellers and brands.
Final Thoughts
The best part about mobile photography is that it lowers the barrier to better visuals. You can create strong ecommerce images with a phone, a simple setup, and a repeatable process.
Start with the basics: clean lens, stable phone, soft light, plain background, accurate editing, and multiple product angles. Then improve your workflow over time.
For growing brands, great phone photography plus professional retouching is often the sweet spot.
If you want cleaner, more consistent, marketplace-ready images without slowing down your team, Photo Fix Team can help turn your raw shots into polished assets that are ready to sell. That is the real power behind these mobile product photography tips for ecommerce sellers: better photos, stronger trust, and a smoother path to more conversions.
Frequently Asked Questions
Find answers to commonly asked questions about our products and services.