Introduction to Cosmetics Photo Editing
The beauty industry thrives on visual perfection. When consumers look at a cosmetics advertisement, they do not just see a product; they see a promise of flawless skin, vibrant color, and luxury. Photo editing is the final, crucial step in fulfilling that promise. Without expert retouching, even the most expensive makeup items can look flat, unappealing, and cheap.
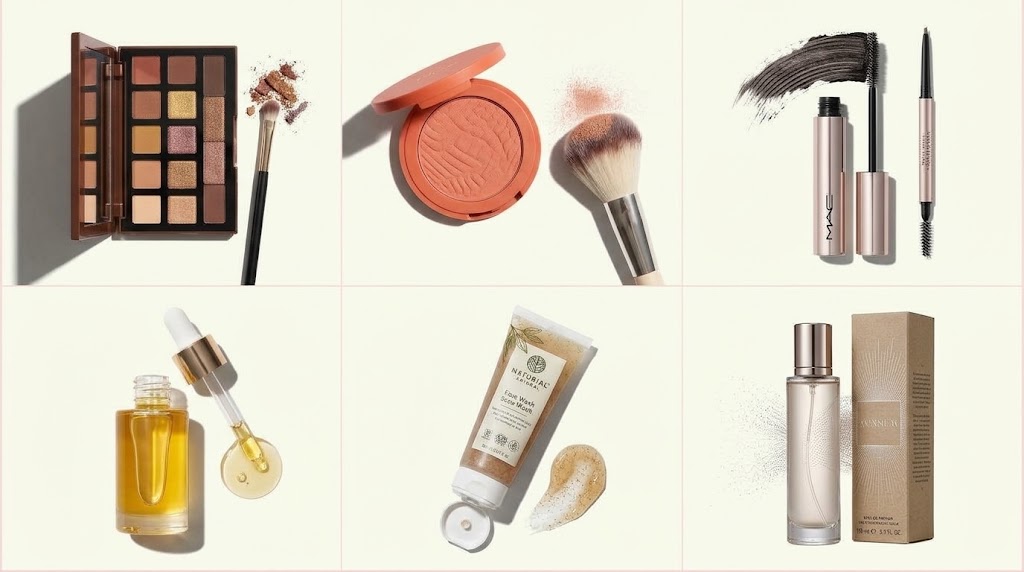
Cosmetics and beauty product photo editing is a specialized niche. It requires a deep understanding of lighting, material science, and digital art. You are not just removing dust spots. You are enhancing glass, balancing complex reflections, and revealing the tactile nature of powders and creams.
In this guide, we will explore the professional workflows required to elevate your beauty product photography. Whether you are editing liquid foundations, glass perfume bottles, or pressed powder palettes, mastering these techniques will set your portfolio apart.
Understanding the Core Challenges
Before diving into software tools, you must understand the physics of what you are shooting. Beauty products use diverse materials. Each material reacts to studio lighting differently.
Glass is reflective and transparent. It traps light and creates harsh hot spots. Plastic can look cheap if not graded properly. Liquids move, settle, and trap air bubbles. Powders crumble and show microscopic texture variations.
Editing these items means solving visual puzzles. You need to control contrast without crushing details. You must remove distracting reflections while keeping enough gloss to prove the product is shiny. Balancing these elements is the hallmark of a master retoucher.
Essential Gear and Software Setup
Great retouching starts with a clean file. While editing cannot completely save a poorly lit photo, it bridges the gap between good and breathtaking.
Adobe Photoshop remains the industry standard for beauty product photo editing. Adobe Lightroom is fantastic for batch processing and basic color grading, but Photoshop is where the intricate work happens. You will rely heavily on adjustment layers, masks, the clone stamp tool, and the brush tool.
Invest in a color-calibrated monitor. If your screen displays colors too warmly, your final export will look unnaturally blue on a customer’s phone. Calibration ensures consistency across all viewing platforms.
Mastering Textures: Powders, Creams, and Liquids
Texture is everything in cosmetics. A customer wants to feel the product through their screen. Let us break down how to handle different formulas.
Pressed Powders and Eyeshadows
Pressed powders easily look chalky or flat under harsh studio strobes. To edit them effectively, follow these steps:
- Clean up stray pigment particles using the Healing Brush.
- Enhance the pressed pattern or embossing using frequency separation or Dodge and Burn techniques.
- Boost midtone contrast gently to make the pigment grains pop without adding digital noise.
Liquid Foundations and Glosses
Liquids present a challenge with unwanted glare and opacity issues. Glass bottles containing liquid foundation often feature unsightly air bubbles or separation lines.
Use the Clone Stamp tool on a separate layer set to “Lighten” or “Darken” blend modes to clean up inner product settling. Keep the surface tension highlights intact. These highlights tell the viewer the product is fluid and fresh.
Conquering Glass and Transparent Packaging
Glass is notoriously difficult to shoot and edit. It acts like a lens, bending light and revealing everything happening behind the camera—including the photographer.
Eliminating Unwanted Reflections
Even with polarizing filters and professional softboxes, stray reflections creep in. To remove them:
- Sample clean areas of the glass using the Clone Stamp tool set at low opacity.
- Paint over the harsh reflection carefully, following the natural curvature of the bottle.
- Use frequency separation to remove color casts while preserving the underlying texture of the glass.
Creating Edge Definition
Transparent bottles often blend into white backgrounds. You need to create crisp, clean edges to make the product pop.
Draw a precise path using the Pen Tool around the bottle. Create a vector mask. Add a subtle inner shadow or a thin stroke on a separate layer to define the silhouette. This separates the product from the background and adds a high-end commercial feel.
The Power of Reflections and Gloss
Reflections define shape. Without reflections, a 3D cylindrical lipstick tube looks like a flat 2D rectangle.
When editing gloss, avoid making surfaces look like polished chrome unless intended. Cosmetics packaging often features satin or semi-matte finishes. Control the specular highlights using curves adjustment layers masked specifically to the highlight zones.
Add a fake gradient reflection if the studio lighting fell flat. A soft, white linear gradient set to a low opacity overlay mode can simulate a large studio strip box, instantly adding luxury appeal to plastic caps and metallic jars.
Color Correction and Grading
Skin tones in beauty ads must look natural, and product colors must match reality. If a lipstick is advertised as “ruby red,” the digital file cannot look orange or magenta.
Use a Color Checker passport during the shoot to establish a custom profile in Lightroom before moving the file to Photoshop. Inside Photoshop, use Selective Color and Hue/Saturation adjustment layers to fine-tune specific pigment shades.
Be careful with the vibrance slider. Pushing vibrance too high ruins delicate pastel eyeshadows and creates neon tones that look fake and unwearable.
Advanced Retouching Techniques: Dust and Scratch Removal
Dust is the enemy of beauty photography. High-resolution macro lenses capture microscopic dust particles on glossy plastic and glass surfaces. Cleaning these physically in the studio is nearly impossible, so the burden falls on the retoucher.
Create a dedicated “Dust Busting” layer above your background. Set the layer blend mode to Normal. Use the Spot Healing Brush and the Brush Tool to paint over dust specks. Working on a separate layer ensures you never destroy the original pixel data beneath.
Zoom out frequently to 50% and 100% views. Fixated micro-retouching can cause you to spend hours removing details that nobody will ever notice at normal viewing sizes.
Compositing and Background Cleanup
Many high-end beauty shots are composites. The liquid splash, the floating droplets, and the main product are rarely captured in a single frame.
To composite a splash shot:
- Isolate the splash elements using precise masking techniques.
- Match the color temperature and exposure of the splash to the main product.
- Add realistic drop shadows and contact shadows where the liquid meets the bottle or the surface.
Shadows ground the product in reality. Floating products look amateurish unless intentionally styled as an abstract art piece. Paint soft, directional contact shadows by hand using a soft black brush on a low-opacity multiply layer.
Speeding Up Your Workflow with Actions and Plugins
Efficiency matters when editing commercial catalogs with hundreds of SKUs. Building a standardized workflow saves hours of repetitive labor.
Create custom Photoshop actions for repetitive tasks like setting up layer structures, adding standard watermarks, or applying baseline sharpening. However, avoid relying on one-click automated retouching plugins. Beauty brands demand bespoke quality; automated filters often smooth out essential product details and create muddy textures.
Conclusion and Final Checklist
Mastering cosmetics and beauty product photo editing takes patience, precision, and an eye for luxury aesthetics. By respecting the unique properties of powders, liquids, and glass, you can transform ordinary product shots into scroll-stopping commercial assets.
Before delivering your final files to a client, run through this quick checklist:
- Are all dust spots and blemishes removed?
- Do glass edges look clean and well-defined?
- Are product colors accurate to the physical items?
- Do contact shadows look natural and grounded?
- Is the resolution optimized for both print and web platforms?
Practice these techniques daily, analyze top-tier beauty campaigns for inspiration, and watch your retouching skills reach professional heights.
Professional retouchers typically rely on industry-standard software like Adobe Photoshop to achieve the precise frequency separation and color grading needed for high-end beauty campaigns.
Ready to see the difference professional retouching can make for your cosmetic portfolio? Don’t just take our word for it—experience the clarity, precision, and efficiency of our editing services firsthand. Head over to our Free Trial Page today to submit a few of your toughest product shots, from tricky glass perfume bottles to high-gloss lipstick tubes, and let our expert editors show you what’s possible.
🚀 Ready to Grow Your eCommerce Business with Professional Clipping Path Services?
Photo Fix Team delivers fast, precise, and affordable clipping path services for eCommerce businesses of all sizes — background removal, white background compliance, ghost mannequin, shadow effects, color correction, and bulk catalog editing with guaranteed quality.
Get a Free Quote Today →