Have you ever wanted to seamlessly integrate a captivating image into a diverse array of designs, from dynamic website banners to intricate graphic compositions? Achieving this visual fluidity hinges on a crucial technique: creating a transparent background. This allows your subject to effortlessly blend with any backdrop, unlocking a world of creative possibilities.
Transparent backgrounds, characterized by their invisibility, enable seamless integration of images into various digital environments. This versatility proves invaluable for web design, graphic design, video editing, and even presentations. By mastering this technique, you’ll gain the freedom to manipulate images with unparalleled flexibility, elevating your creative projects to new heights.
This comprehensive guide will equip you with the knowledge and skills necessary to create transparent backgrounds in Photoshop, empowering you to unlock the full creative potential of your imagery.
Understanding Transparency in Photoshop
At the heart of Photoshop’s transparency capabilities lies the concept of alpha channels. These channels act as a mask, determining which areas of an image are visible and which are transparent. Essentially, each pixel within an image has an associated alpha value, ranging from 0 (fully transparent) to 255 (fully opaque).
Several methods can be employed to achieve transparency in Photoshop:
- Background Eraser Tool: This versatile tool effectively removes background pixels while preserving the edges of your subject.
- Quick Selection Tool: This intuitive tool allows for rapid selection of your subject, enabling you to easily isolate it from the background.
- Pen Tool: For intricate subjects with complex shapes, the Pen Tool offers precise control, allowing you to meticulously outline the subject and create a clean selection.
- Layer Masking: This non-destructive technique provides a flexible approach to isolating your subject, allowing for fine-grained control over transparency.
Preparing Your Image
Selecting the appropriate image for background removal is crucial. High-resolution images with well-defined edges between the subject and background generally yield the most successful results. Image types such as TIFF and PSD, which support high color depths and preserve image data, are often preferred.
Image resolution and size also play a significant role. Higher resolutions provide greater detail, enabling more precise background removal. However, excessively large files can strain system resources. Consider the intended use of the image and adjust its size accordingly.
The background color can significantly impact the ease of background removal. Contrasting colors between the subject and background facilitate easier selection and removal. For instance, a dark subject against a light background or vice versa can simplify the process.
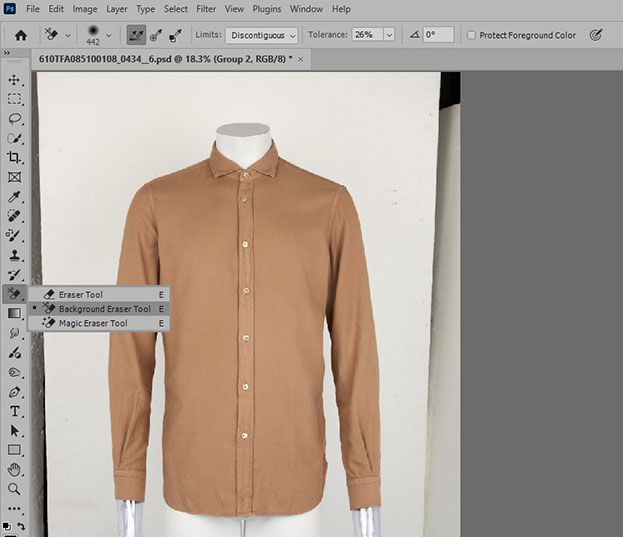
Method 1: Background Eraser Tool
The Background Eraser Tool is specifically designed to remove background pixels while preserving the edges of the subject. It intelligently analyzes the pixels around the brush tip and erases only those that it determines to be part of the background.
Key settings for the Background Eraser Tool include:
- Brush Size: Controls the area affected by each brush stroke.
- Hardness: Determines the sharpness of the brush edges.
- Limits: Restricts erasing to specific color ranges, ensuring that only the background is removed.
- Sampling: Controls how the tool analyzes and erases pixels, allowing for consistent removal across varying background colors.

To effectively use the Background Eraser Tool:
- Select the Background Eraser Tool from the Tools panel.
- Adjust the tool settings according to the specific requirements of your image.
- Carefully erase the background by painting over the areas you wish to remove.
- Refine the edges by zooming in and using smaller brush sizes to ensure precise removal.
- Utilize the “Sample” option to maintain consistency when erasing across areas with varying background colors.
Method 2: Quick Selection Tool
The Quick Selection Tool offers a rapid and intuitive approach to selecting your subject. By simply brushing over the subject, the tool intelligently expands the selection based on color and edge detection.
To refine the selection further, Photoshop provides the Refine Edge tool. This powerful tool allows for fine-grained adjustments to the selection boundaries, ensuring accurate isolation of the subject.

Key settings within the Refine Edge tool include:
- Radius: Controls the sensitivity of edge detection.
- Smooth: Smooths out jagged edges for a more natural appearance.
- Feather: Creates a gradual transition between the selected and unselected areas.
- Contrast: Enhances the contrast between the subject and background, improving selection accuracy.
To utilize the Quick Selection Tool and Refine Edge:
- Select the Quick Selection Tool from the Tools panel.
- Brush over the subject to create an initial selection.
- Access the Refine Edge tool by clicking the “Refine Edge” button in the options bar.
- Adjust the settings within the Refine Edge dialog box to refine the selection boundaries.
- Create a layer mask by clicking the “New Layer Mask” icon at the bottom of the Layers panel. This applies the selection to a layer mask, effectively isolating the subject from the background.
Method 3: Pen Tool
For subjects with complex shapes or intricate details, the Pen Tool offers unparalleled precision. This versatile tool allows you to draw a path that accurately outlines the subject, creating a clean and accurate selection.

To use the Pen Tool for background removal:
- Select the Pen Tool from the Tools panel.
- Draw a path around the subject by clicking and dragging to create anchor points and curves.
- Convert the path to a selection by right-clicking on the path and selecting “Make Selection.”
- Create a layer mask as described in the previous method.
Method 4: Layer Masking
Layer masks provide a non-destructive approach to controlling the visibility of a layer. By painting on the layer mask with black and white, you can reveal or conceal specific areas of the layer.
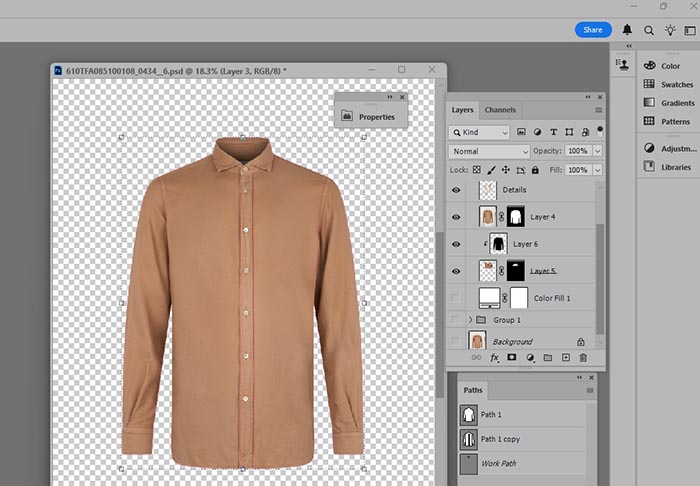
To create a layer mask:
- Add a layer mask to the image layer by clicking the “Add Layer Mask” icon at the bottom of the Layers panel.
- Use the Brush Tool with black paint to hide areas of the image.
- Use the Brush Tool with white paint to reveal areas of the image.
- Refine the mask by zooming in and using smaller brush sizes for precise control.
Advanced Techniques
- Refine Edge Brush: This specialized brush within the Refine Edge tool provides pixel-level control, allowing for precise adjustments to the selection boundaries.
- Color Range: This tool selects pixels within a specific color range, making it ideal for isolating subjects with distinct colors.
- Select Subject: Photoshop’s AI-powered selection tool intelligently analyzes the image and automatically selects the main subject.
- Adjustment Layers: Enhance the appearance of your subject after background removal using adjustment layers for brightness/contrast, color balance, and other enhancements.
Troubleshooting Common Issues
- Dealing with hair and fur: Utilize the Refine Edge tool with settings such as “Smart Radius” and “Decontaminate Colors” to effectively isolate intricate details.
- Removing shadows: Employ the Clone Stamp Tool or the Healing Brush Tool to seamlessly remove shadows while maintaining the integrity of the subject.
- Fixing jagged edges: Utilize the Smooth tool within the Refine Edge dialog box or apply a slight Gaussian Blur to smooth out rough edges.
Saving Your Transparent Image
To preserve transparency, save your image in a file format that supports it.
- PNG (Portable Network Graphics): This lossless format effectively maintains transparency and supports a wide range of colors.
- GIF (Graphics Interchange Format): While suitable for simple images with limited colors, GIF supports only a single level of transparency.
To save as PNG:
- Go to File > Save As.
- Select PNG as the file format.
- Adjust the compression settings as needed.
- Click Save.
To check for transparency:
- Open the image in a web browser or another application.
- Place the image on a different colored background. If the background shows through, the image has a transparent background.
Tips and Tricks
- Utilize keyboard shortcuts for faster workflow. For example, press Ctrl+Shift+N (Windows) or Command+Shift+N (macOS) to create a new layer.
- Work non-destructively by using layer masks and adjustment layers to preserve the original image data.
- Practice regularly to refine your skills and increase your efficiency.
Conclusion
Mastering the art of creating transparent backgrounds in Photoshop unlocks a world of creative possibilities. By employing the techniques outlined in this guide, you can seamlessly integrate your imagery into diverse design projects, achieving stunning visual effects.
Continue exploring advanced tutorials and resources to further enhance your skills and expand your creative horizons. With consistent practice and a thorough understanding of these techniques, you’ll be well on your way to creating captivating and dynamic visual compositions.

Amazon Apparel Image Mistakes That Secretly Kill Sales (2026 Fix Guide)
Categories Introduction If your clothing products are not converting on Amazon, there’s a high chance…

How We Helped an E-commerce Brand Increase Sales by 35% with Professional Retouching
When it comes to e-commerce, first impressions are crucial. A shopper’s decision to click “Add…

How to Use Ghost Mannequin Photography to Showcase Your Apparel Products
Empowering Success TogetherHow to Use Ghost Mannequin Photography to Showcase Your Apparel ProductsWe provide comprehensive…

Spring Fashion 2025: The Hottest Colors to Wear
Empowering Success TogetherSpring Fashion 2025: The Hottest Colors to WearWe provide comprehensive solutions and support…
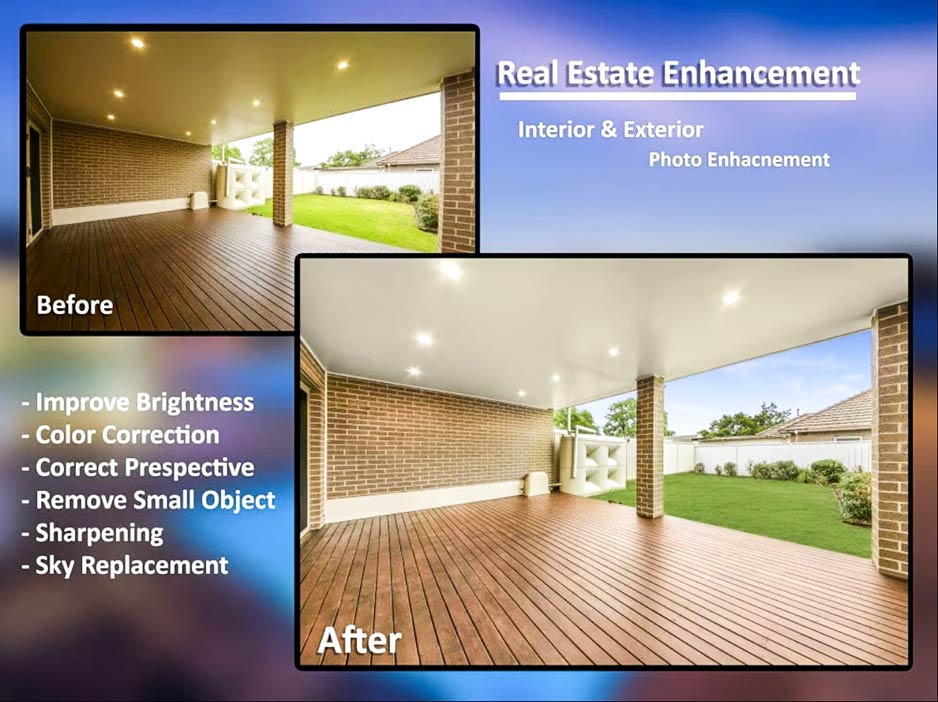
Real Estate Photo Remote Editing: The Ultimate Guide to Enhancing Property Images
Empowering Success TogetherReal Estate Photo Remote Editing: The Ultimate Guide to Enhancing Property ImagesWe provide…

DIY vs Professional Ecommerce Photo Editing: Which is Right for You?
Empowering Success TogetherDIY vs. Professional Ecommerce Photo Editing: Which is Right for You?We provide comprehensive…
LET’S COLLABORATE TO ENHANCE YOUR PHOTO
OUR ECOMMERCE PHOTO EDITING SERVICES READY FOR YOU!
Get the Awesome Quote!
One of the most important things is to pick the best professional ecommerce photo editing services company.
Quick Peek at Our Quality!
Every issue that arises will be explained in detail. It’s time to start planning your adventures with our ecommerce photo editing service.