
Make Smooth as Clothes in Photoshop
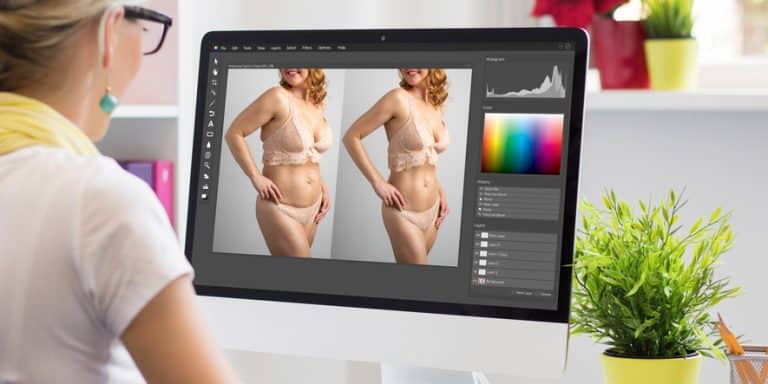
Photoshop is an indispensable tool for photographers and designers who aim to perfect their images, particularly when it comes to achieving smooth, wrinkle-free fabrics. Whether you’re editing fashion photography or preparing images for a catalog, Photoshop offers a suite of tools and techniques to ensure that every piece of clothing looks impeccably smooth and polished. This guide will walk you through the steps to master fabric smoothness, from setting up your workspace to applying advanced techniques.
Setting Up Your Workspace
Installing and Launching Photoshop
The first step to enhancing fabric smoothness in your images is to have Photoshop installed and ready to use. Download the latest version of Adobe Photoshop from the official Adobe website and follow the installation instructions. Once installed, launch the application and familiarize yourself with the interface. Starting with a clean workspace tailored to your editing needs can significantly streamline your workflow.
Customizing Your Workspace for Fabric Editing
Customizing your workspace is crucial for efficiency and ease of use. Photoshop allows you to arrange panels and tools to suit your specific tasks. For fabric editing, ensure that you have quick access to layers, adjustment tools, and the brush palette. You can save your custom workspace setup by navigating to Window > Workspace > New Workspace. This setup helps you quickly access the tools and functions you’ll use frequently, enhancing your editing speed and accuracy.
Importing Your Image
Import your image into Photoshop by selecting File > Open and choosing the image file from your computer. High-resolution images are preferable as they provide more detail and better results during the editing process. Once your image is open, it’s time to start the smoothing process.
Basic Tools for Smoothing Clothes
The Spot Healing Brush Tool
The Spot Healing Brush Tool is perfect for quickly removing small wrinkles and imperfections. Select the tool from the toolbar or press J. Simply click and drag over the areas you want to smooth out. Photoshop will automatically blend the surrounding pixels, creating a seamless appearance. This tool is excellent for minor touch-ups and initial smoothing.
The Clone Stamp Tool
For more control over the smoothing process, the Clone Stamp Tool is invaluable. Select it from the toolbar or press S. Hold down the Alt key (Option key on Mac) and click to sample an area of smooth fabric. Then, paint over the wrinkled areas with the sampled texture. This technique allows for precise corrections and is particularly useful for larger or more intricate wrinkles.
The Patch Tool
The Patch Tool is ideal for repairing larger sections of wrinkled fabric. Select it from the toolbar or press J and choose the Patch Tool from the dropdown menu. Draw a selection around the wrinkled area and drag it to a smooth part of the fabric. Photoshop will blend the textures, effectively removing the wrinkles. This tool is great for significant adjustments and ensuring consistency across the fabric.
Advanced Smoothing Techniques
Using the Healing Brush Tool for Precision
For detailed work, the Healing Brush Tool provides precision and control. Select it from the toolbar or press J and choose the Healing Brush Tool from the dropdown menu. Hold Alt (Option on Mac) to sample a smooth area, then paint over the wrinkled sections. Unlike the Spot Healing Brush, the Healing Brush Tool allows you to choose your source texture, providing more accurate results.
Utilizing the Content-Aware Fill
The Content-Aware Fill feature is a powerful tool for removing wrinkles and adjusting fabric. Make a rough selection around the wrinkled area using the Lasso Tool (L), then go to Edit > Content-Aware Fill. Photoshop will analyze the surrounding pixels and fill the selection with smooth fabric. This tool is particularly effective for larger, more complex areas.
Applying the Liquify Filter for Fabric Adjustments
The Liquify Filter is not only for reshaping but also for subtly adjusting fabric. Go to Filter > Liquify. Use the Forward Warp Tool (W) to gently push and pull the fabric, smoothing out wrinkles without distorting the overall image. The Liquify Filter allows for delicate adjustments, making it perfect for fine-tuning your edits.
Layer Management
Creating and Organizing Layers
Working with layers is fundamental in Photoshop. Create a new layer for each significant edit by selecting Layer > New > Layer. Name your layers appropriately to keep your workspace organized. This method allows you to make non-destructive edits, meaning you can always go back and adjust or remove changes without affecting the original image.
Using Adjustment Layers for Non-Destructive Editing
Adjustment layers are crucial for non-destructive editing. They allow you to apply color corrections, brightness adjustments, and more without permanently altering the underlying image. For example, to adjust the brightness, go to Layer > New Adjustment Layer > Brightness/Contrast. These layers can be modified at any time, providing flexibility and control over your edits.
Merging and Flattening Layers
Once you are satisfied with your edits, you might need to merge or flatten layers to simplify the image. Merging layers can be done by selecting the layers you want to combine and pressing Ctrl+E (Cmd+E on Mac). To flatten the image, go to Layer > Flatten Image. This step consolidates all your edits into a single layer, making it easier to save and export the final image.
Refining Fabric Textures
Reducing Noise with the Noise Filter
Noise can make fabric appear rough and less smooth. To reduce noise, go to Filter > Noise > Reduce Noise. Adjust the settings to remove unwanted noise while preserving detail. This filter is especially useful for images taken at high ISO settings or in low light conditions.
Enhancing Details with the High Pass Filter
The High Pass Filter is great for sharpening and enhancing fabric details. Duplicate your image layer and go to Filter > Other > High Pass. Set the radius to highlight the edges and then change the layer blending mode to Overlay or Soft Light. This technique sharpens the image and enhances texture, making the fabric look crisp and detailed.
Smoothing Textures with the Surface Blur Filter
To achieve a smooth, polished look, use the Surface Blur Filter. Go to Filter > Blur > Surface Blur. Adjust the Radius and Threshold to blur the surface while maintaining edge details. This filter is excellent for creating a silky smooth fabric appearance without losing important details.
Color Correction and Enhancement
Adjusting Levels and Curves
Accurate color correction can enhance the overall look of the fabric. Use the Levels tool (Ctrl+L or Cmd+L) to adjust the brightness and contrast. For more precise adjustments, use the Curves tool (Ctrl+M or Cmd+M). These tools allow you to refine the tonal range and color balance, ensuring the fabric looks vibrant and true to life.
Using the Hue/Saturation Tool
The Hue/Saturation tool (Ctrl+U or Cmd+U) is perfect for adjusting the color intensity. You can enhance or tone down specific colors, making the fabric appear more uniform and appealing. This tool is especially useful for correcting color discrepancies caused by lighting or camera settings.
Applying Color Balance for Realistic Tones
For realistic color adjustments, use the Color Balance tool (Ctrl+B or Cmd+B). This tool allows you to fine-tune the color tones in the shadows, midtones, and highlights. Adjusting the color balance ensures that the fabric colors look natural and consistent, enhancing the overall quality of the image.
Creating Realistic Shadows and Highlights
Dodging and Burning Techniques
Dodging and burning are essential techniques for adding depth and dimension to your images. Use the Dodge Tool (O) to lighten specific areas and the Burn Tool (O) to darken them. These tools help create realistic shadows and highlights, making the fabric appear more three-dimensional and lifelike.
Adding Depth with the Gradient Tool
The Gradient Tool (G) can be used to add subtle depth and shading to your image. Create a new layer and apply a gradient from black to transparent or white to transparent. Change the layer blending mode to Soft Light or Overlay. This technique enhances the depth and realism of the fabric, making it look more dynamic.
Enhancing Highlights with the Brush Tool
Use the Brush Tool (B) to manually add highlights to the fabric. Select a soft brush and a light color, then paint over the areas where you want to enhance the highlights. This method allows for precise control and can make the fabric appear more vibrant and luminous.
Removing Wrinkles and Creases
Identifying Problem Areas
Before you begin smoothing out wrinkles and creases, it’s essential to identify the problem areas in your image. Carefully inspect the fabric for any noticeable imperfections that disrupt the overall appearance. Pay special attention to regions with heavy creasing or distortion, as these will require more detailed work. Mark these areas mentally or create a duplicate layer and use a low-opacity brush to highlight them temporarily, ensuring you don’t miss any spots during the editing process.
Using the Clone Stamp and Healing Brush for Wrinkles
The Clone Stamp Tool and Healing Brush Tool are your best allies in removing wrinkles and creases. Select the Clone Stamp Tool (S) and choose a soft brush. Hold the Alt key (Option on Mac) and click to sample a smooth area of fabric. Gently brush over the wrinkled areas, matching the texture and pattern of the fabric. The Healing Brush Tool (J) works similarly but blends the sampled texture with the surrounding pixels more seamlessly. Use this tool for smaller, more intricate wrinkles to maintain the fabric’s natural look.
Blending Crease Lines for a Smooth Finish
For a perfectly smooth finish, blending crease lines is crucial. Use the Patch Tool (J) to select the creased area, then drag the selection to a smoother part of the fabric. Photoshop will blend the textures, effectively erasing the crease. For finer adjustments, the Smudge Tool (R) can be used to softly blur and blend edges, ensuring a natural transition between different parts of the fabric. This meticulous blending creates a seamless, smooth appearance, free from visible lines or disruptions.
Perfecting Edges and Seams
Cleaning Up Edges with the Pen Tool
Edges and seams are critical areas that can make or break the illusion of smooth fabric. The Pen Tool (P) is perfect for cleaning up these edges with precision. Create a path along the edge of the fabric, then convert the path to a selection (right-click and choose Make Selection). Use the Clone Stamp Tool or Healing Brush Tool within the selection to ensure clean, sharp edges. This method allows for meticulous control, ensuring your fabric looks crisp and well-defined.
Refining Seams with the Smudge Tool
The Smudge Tool (R) is ideal for refining seams, especially when they appear too sharp or artificial after initial edits. Select the tool and choose a small, soft brush. Gently drag along the seams to soften any harsh lines and blend the fabric naturally. This technique helps integrate the seams smoothly into the fabric, maintaining the overall consistency and flow.
Using the Refine Edge Tool for Precision
For the final touches on edges and seams, the Refine Edge Tool provides precision and finesse. After making a selection with the Pen Tool or any selection tool, go to Select > Refine Edge (or Select and Mask in newer versions). Adjust the settings to smooth, feather, and contract/expand the edge as needed. This tool is particularly useful for ensuring that the edges of the fabric look natural and integrated with the rest of the image, eliminating any hard lines or jagged edges.
Fabric Pattern Adjustments
Matching Patterns Seamlessly
When working with patterned fabrics, ensuring the patterns match seamlessly is essential for realism. Use the Clone Stamp Tool to sample and replicate patterns accurately. Align the sampled area with the existing pattern, adjusting as necessary to ensure continuity. This meticulous attention to detail prevents the fabric from looking artificial or disjointed.
Scaling and Rotating Patterns
Sometimes patterns need to be scaled or rotated to fit the fabric naturally. Use the Transform Tool (Ctrl+T or Cmd+T) to adjust the size and orientation of the pattern. Hold the Shift key while scaling to maintain proportions, and use the rotation handle to align the pattern correctly. This technique is crucial for maintaining the integrity of the fabric design, especially in areas where the fabric curves or folds.
Blending Patterns with Layer Masks
Layer masks are invaluable for blending patterns seamlessly. Apply a layer mask to the patterned layer and use a soft brush to paint black on the mask, gradually blending the pattern into the underlying fabric. This method allows for smooth transitions and avoids harsh lines between different sections of the pattern. Layer masks provide flexibility and precision, enabling you to adjust the blending as needed.
Sharpening Techniques for Fabric
Using the Smart Sharpen Filter
The Smart Sharpen Filter enhances fabric details without introducing unwanted artifacts. Go to Filter > Sharpen > Smart Sharpen. Adjust the settings to sharpen the image while controlling the amount, radius, and noise reduction. This filter provides advanced options to fine-tune the sharpening effect, ensuring the fabric appears crisp and detailed.
Applying Unsharp Mask for Fine Details
The Unsharp Mask is another effective tool for sharpening fabric. Go to Filter > Sharpen > Unsharp Mask. Set the Amount to control the intensity, the Radius to determine the size of the details being sharpened, and the Threshold to minimize noise. This filter is particularly useful for bringing out fine details in intricate fabrics, enhancing their texture and realism.
Balancing Sharpness and Smoothness
Achieving the right balance between sharpness and smoothness is key to realistic fabric editing. Over-sharpening can make the fabric look unnatural, while too much smoothing can blur important details. Use a combination of sharpening filters and smoothing techniques like Surface Blur (Filter > Blur > Surface Blur) to achieve a balanced look. This approach ensures the fabric retains its natural texture while appearing smooth and polished.
Final Touches and Enhancements
Adding Realistic Fabric Textures
To add depth and realism, consider overlaying realistic fabric textures. Find high-resolution texture images that match the fabric type and apply them as new layers. Set the blending mode to Overlay or Soft Light and adjust the opacity to integrate the texture with the original fabric. This technique adds subtle details that enhance the overall appearance, making the fabric look more authentic.
Enhancing Fabric with Custom Brushes
Custom brushes can be used to add fine details and enhance fabric texture. Photoshop offers a variety of brushes, or you can create your own. Use these brushes to paint over areas that need extra detail or texture. Adjust the brush settings for size, opacity, and flow to achieve the desired effect. This method allows for creative control, adding unique touches to your fabric edits.
Using Layer Styles for Additional Effects
Layer styles can add depth and dimension to your fabric. Right-click on a layer and select Blending Options to access layer styles like Bevel & Emboss, Drop Shadow, and Satin. These effects can enhance the fabric’s appearance by adding shadows, highlights, and other stylistic elements. Experiment with different settings to find the perfect combination that enhances the fabric’s realism and appeal.
Saving and Exporting Your Image
Choosing the Right File Format
Selecting the appropriate file format is crucial for maintaining image quality and ensuring compatibility with different platforms. For high-quality prints, save your image as a TIFF or PSD file. These formats retain all layers and details, providing maximum flexibility for future edits. For web use, export your image as a JPEG or PNG. JPEGs are suitable for photographs due to their smaller file sizes, while PNGs are ideal for images requiring transparency and higher quality. Always consider the end use of your image when choosing the file format to ensure optimal results.
Adjusting Export Settings for Quality
Before exporting, adjust the export settings to balance quality and file size. In Photoshop, go to File > Export > Export As. For JPEGs, set the quality slider between 80-100% to maintain high resolution without excessively large file sizes. For PNGs, ensure that the Compression level is set to None or Fast. For TIFFs, select LZW compression to reduce file size without losing quality. These adjustments help optimize the image for its intended use, ensuring it looks its best whether in print or online.
Preparing Images for Print and Web
For print, set the resolution to at least 300 DPI (dots per inch) to ensure sharpness and clarity. Use CMYK color mode, as this is standard for printing. For web, a resolution of 72 DPI is sufficient, and the RGB color mode is preferred. Resize the image to the required dimensions to avoid stretching or pixelation. These steps ensure that your images are appropriately prepared for their specific medium, enhancing their visual appeal and effectiveness.
Tips for Different Types of Fabrics
Smoothing Silk and Satin
Silk and satin are delicate fabrics that require a gentle touch. Use the Healing Brush Tool to remove minor imperfections and the Clone Stamp Tool for larger areas. Apply the Surface Blur filter to achieve a smooth, glossy finish, adjusting the settings to maintain the fabric’s natural sheen. Be cautious not to overdo it, as silk and satin should retain a subtle texture to appear realistic.
Editing Denim and Heavy Fabrics
Denim and other heavy fabrics have distinct textures that need careful handling. Use the High Pass filter to enhance the fabric’s natural grain and the Smart Sharpen filter to define edges. The Clone Stamp Tool can help remove imperfections while preserving the texture. For a natural look, avoid excessive blurring, as the rugged appearance is a characteristic feature of these fabrics.
Working with Lace and Delicate Textures
Lace and other delicate textures require precision. Use the Pen Tool to make detailed selections and the Clone Stamp Tool to fix minor flaws. Apply the Surface Blur filter minimally to avoid losing intricate details. Enhancing contrast and sharpness can help define the delicate patterns, ensuring that the fabric’s elegance is preserved in the final image.
Common Mistakes and How to Avoid Them
Over-Smoothing Fabrics
One common mistake is over-smoothing, which can make fabrics look unrealistic. To avoid this, use the Surface Blur and Smudge tools sparingly. Maintain a balance by preserving some of the fabric’s natural texture and details. Over-smoothing can lead to a plastic-like appearance, which detracts from the image’s authenticity.
Inconsistent Texture Application
Inconsistent texture application can create a disjointed look. Ensure that the texture remains uniform across the fabric by using the Clone Stamp Tool and Healing Brush Tool consistently. When blending areas, check for any visible transitions and smooth them out to achieve a cohesive appearance. Consistency in texture maintains the fabric’s natural look and feel.
Ignoring Lighting and Shadows
Ignoring lighting and shadows can result in a flat, lifeless image. Pay attention to the original light source and maintain consistent highlights and shadows. Use the Dodge and Burn tools to enhance these elements, adding depth and dimension to the fabric. Properly managed lighting and shadows contribute significantly to the realism and appeal of your edits.
Using Photoshop Actions for Efficiency
Creating Custom Actions for Smoothing
Photoshop actions can streamline your workflow by automating repetitive tasks. Create custom actions for common smoothing techniques by recording your steps. Go to Window > Actions, click the New Action button, and start recording. Perform the smoothing process, then stop recording. This action can be applied to future images, saving time and ensuring consistency.
Downloading and Installing Pre-Made Actions
Numerous pre-made actions are available online, designed to enhance fabric smoothing and other edits. Download and install these actions to expand your toolkit. To install, go to Window > Actions, click the menu icon, and select Load Actions. Choose the downloaded action file and add it to your list. These pre-made actions can provide professional-quality results with minimal effort.
Batch Processing Multiple Images
Batch processing allows you to apply actions to multiple images simultaneously. Go to File > Automate > Batch, select the action you want to use, and choose the source folder containing your images. This process efficiently handles large volumes of images, ensuring uniformity and significantly reducing editing time.
Incorporating Feedback and Revisions
Collaborating with Clients and Teams
Effective collaboration with clients and teams is crucial for successful edits. Share your progress and seek feedback regularly to ensure the final result meets expectations. Use collaborative tools like Adobe Creative Cloud to share files and gather input. Clear communication and regular updates foster a smooth workflow and client satisfaction.
Implementing Feedback Effectively
When receiving feedback, take notes and prioritize the requested changes. Address each point methodically, ensuring you incorporate the feedback accurately. Use adjustment layers and non-destructive editing techniques to make revisions easily. Implementing feedback effectively demonstrates professionalism and enhances the quality of your work.
Iterating on Your Edits for Perfection
Perfection often requires multiple iterations. Review your edits critically and make incremental improvements. Compare different versions to assess which adjustments work best. This iterative process helps refine your techniques and ensures the highest quality results, showcasing your commitment to excellence.
Maintaining Realism in Your Edits
Balancing Perfection and Natural Appearance
Striking a balance between perfection and natural appearance is key to realistic edits. Avoid excessive smoothing and maintain some of the fabric’s natural imperfections. Use subtle adjustments to enhance the fabric while preserving its inherent characteristics. This balance ensures that your edits look polished yet authentic.
Avoiding the Plastic Look
The plastic look occurs when fabrics are overly smoothed and lose their natural texture. To avoid this, use a combination of smoothing and sharpening techniques. Apply filters and tools with moderation, checking your work frequently. Preserving the fabric’s texture prevents the artificial appearance and maintains realism.
Ensuring Consistency Across the Image
Consistency is essential for a cohesive look. Ensure that the fabric’s texture, lighting, and shadows are uniform throughout the image. Regularly zoom in and out to check for discrepancies and adjust accordingly. Consistent edits enhance the overall quality and professionalism of your work.
Exploring Alternative Methods
Third-Party Plugins for Smoothing
Third-party plugins can offer advanced smoothing techniques and additional functionalities. Plugins like Imagenomic’s Portraiture or Nik Collection’s Dfine provide specialized tools for fabric smoothing and noise reduction. Explore these plugins to enhance your editing capabilities and achieve superior results.
Comparing Photoshop to Other Editing Software
Photoshop is a powerful tool, but other editing software like GIMP, Affinity Photo, and Corel PaintShop Pro also offer robust features. Compare these programs to determine which best suits your needs. Each software has unique tools and workflows, and exploring alternatives can expand your skill set and provide new approaches to fabric editing.
Combining Tools for Optimal Results
Combining tools and techniques from different software can yield optimal results. Use Photoshop for its advanced layer management and detailed editing tools, and integrate features from other programs as needed. This approach allows you to leverage the strengths of each tool, achieving the best possible outcome for your fabric edits.
Resources for Continuous Learning
Photoshop Tutorials and Online Courses
Continuous learning is essential for mastering Photoshop. Websites like Adobe’s official site, Lynda.com, and Udemy offer extensive tutorials and courses. These resources cover a wide range of topics, from basic techniques to advanced methods, helping you refine your skills and stay updated with the latest trends.
Forums and Communities for Photoshop Users
Joining forums and communities provides support and inspiration. Platforms like Adobe Forums, Reddit’s r/photoshop, and DeviantArt allow you to connect with other Photoshop users, share your work, and seek advice. Engaging with these communities fosters growth and encourages collaboration.
Books and Guides on Advanced Editing Techniques
Books and guides offer in-depth knowledge on advanced editing techniques. Titles like “Adobe Photoshop Classroom in a Book” and “The Adobe Photoshop Lightroom Classic CC Book for Digital Photographers” provide comprehensive insights. Reading these guides enhances your understanding and mastery of Photoshop’s capabilities.
Conclusion: Mastering Fabric Smoothness in Photoshop
Mastering fabric smoothness in Photoshop requires a combination of basic tools, advanced techniques, and continuous learning. By understanding the nuances of different fabrics, avoiding common mistakes, and incorporating feedback effectively, you can achieve professional and realistic results. Explore alternative methods and resources to stay updated and enhance your skills. Embrace the process of refinement and perfection, ensuring that every piece of fabric in your images looks impeccably smooth and polished.

How to Remove Background from Product Photos: A Complete Guide for E-Commerce Sellers
📂 Categories 🛒 Ecommerce Business 📸 E-commerce Photo Tips 🖼️ Platform Image Req. 📦 Amazon…

WooCommerce Product Image Optimization Guide for Better Store Performance
📂 Categories 🛒 Ecommerce Business 📸 E-commerce Photo Tips 🖼️ Platform Image Req. 📦 Amazon…

How Clipping Path Services Help eCommerce Businesses Grow Faster
📂 Categories 🛒 Ecommerce Business 📸 E-commerce Photo Tips 🖼️ Platform Image Req. 📦 Amazon…

Amazon Apparel Image Mistakes That Secretly Kill Sales (2026 Fix Guide)
📂 Categories 🛒 Ecommerce Business 📸 E-commerce Photo Tips 🖼️ Platform Image Req. 📦 Amazon…
How We Helped an E-commerce Brand Increase Sales by 35% with Professional Retouching
📂 Categories 🛒 Ecommerce Business 📸 E-commerce Photo Tips 🖼️ Platform Image Req. 📦 Amazon…
Ghost Mannequin Photography for Apparel: How to Showcase Clothing Better Online
📂 Categories 🛒 Ecommerce Business 📸 E-commerce Photo Tips 🖼️ Platform Image Req. 📦 Amazon…