
If you sell products online, create marketing graphics, or want cleaner visuals for your brand, learning how to remove background in Photoshop can save you time and instantly improve image quality.
A clean background makes product photos look more professional, helps shoppers focus on the item itself, and creates a more consistent look across your website, marketplace listings, and social media. That matters for ecommerce brands, especially when you’re trying to build trust fast.
Photoshop gives you several ways to remove a background, from quick automated tools to more detailed manual methods. The best option depends on the image. A simple white backdrop is easier than a model wearing textured clothing or a product with fur, glass, or soft edges.
In this guide, you’ll learn the most practical ways to handle Photoshop background removal, when each method works best, and how to get cleaner results without wasting time.
Why Background Removal Matters for Ecommerce
Background removal is not just a design trick. For online stores, it plays a direct role in presentation, consistency, and conversions.
Here’s why it matters:
- Clean images look more professional
- Products stand out better in category pages and search results
- White or transparent backgrounds make images easier to reuse
- Consistent visuals help your brand look trustworthy
- Marketplace-ready images are easier to prepare for Amazon, Shopify, Etsy, and more
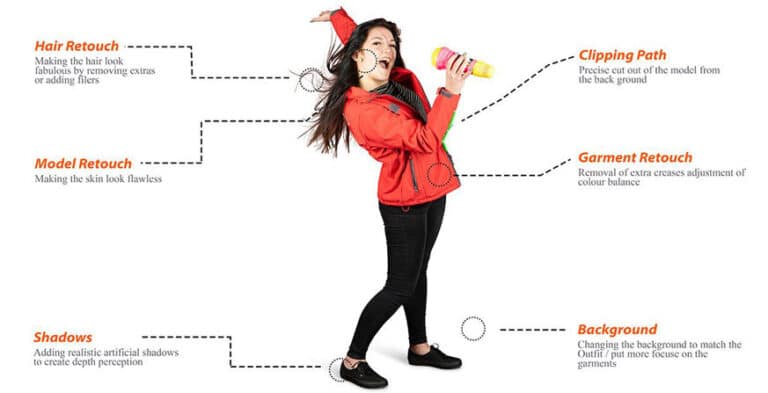
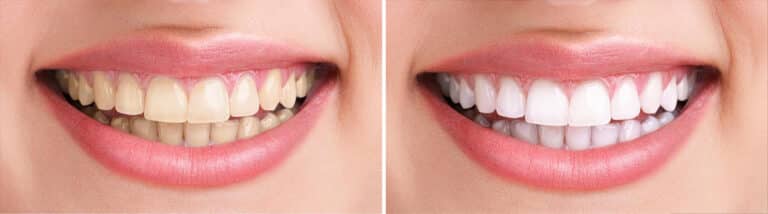
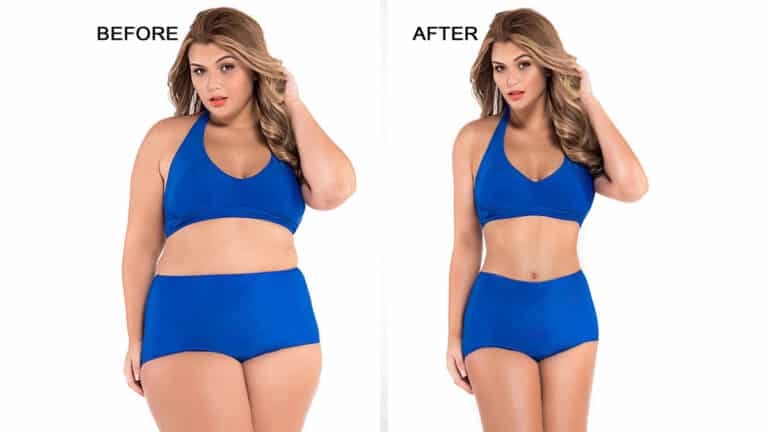
Many ecommerce brands use background removal as part of a larger product image workflow that also includes retouching, shadow creation, color correction, and resizing.
Best Photoshop Tools for Background Removal
Photoshop includes several tools for removing backgrounds. The smartest approach is choosing the one that matches the image.
1. Remove Background Quick Action
This is the fastest option for simple images. Adobe offers a Quick Action that can automatically detect the subject and remove the background. It is useful when you need speed and the edges are not too complex.
2. Select Subject
This tool automatically identifies the main object in the image. It’s a strong starting point for products, people, and objects with clear separation from the background.
3. Select and Mask
For images with hair, fur, soft fabric, or detailed edges, Select and Mask Photoshop is often the best option because it allows more edge refinement and cleanup. Adobe’s documentation specifically positions Select and Mask as the place for more accurate selection refinement.
4. Pen Tool
The Pen Tool is slower, but it gives precise control. It works especially well for products with hard edges like shoes, bottles, furniture, electronics, and packaged goods.
5. Layer Masks
Layer masks are ideal when you want non-destructive editing. Instead of deleting the background permanently, you hide it and can adjust the mask later.
The Fastest Way to Remove Background in Photoshop
If you need a quick method, this is the easiest workflow.
Step 1: Open Your Image
Launch Photoshop and open the photo you want to edit.
Step 2: Unlock the Layer
If your image is locked as a background layer, click the lock icon in the Layers panel.
Step 3: Use Remove Background
Go to the Properties panel and click Remove Background.
Photoshop will create a mask and cut the subject from the background automatically. Adobe officially highlights this as one of the quickest ways to remove a background.
Step 4: Zoom In and Check the Edges
Look closely around corners, shadows, handles, transparent areas, and fine details. Fast tools save time, but they don’t always create perfect edges.
Step 5: Refine If Needed
If parts of the subject are missing or the cutout looks rough, open Select and Mask or edit the layer mask manually with a soft brush.
This method is best for:
- products on plain backgrounds
- simple portraits
- social graphics
- quick mockups
It is not always best for:
- hair and fur
- glass or reflective objects
- lace, mesh, or transparent packaging
- very low-contrast images
How to Remove Background in Photoshop with Select and Mask
When image quality matters, especially for brand visuals or online stores, this method usually gives better results.
Step 1: Select the Subject
Use Select Subject first to create the initial selection.
Step 2: Open Select and Mask
With the selection active, click Select and Mask from the top menu.
Step 3: Choose a Better View Mode
Switch between overlays, black, white, or onion skin views so you can clearly see missed areas and rough edges.
Step 4: Refine the Edges
Use the edge refinement tools to improve tricky areas like:
- hair
- soft fabric
- fuzzy materials
- rounded corners
- transparent or semi-transparent edges
Adobe’s official guidance explains that the Select and Mask workspace is built for more accurate selection refinement and control.
Step 5: Output to Layer Mask
Choose Output to: Layer Mask so the edit stays flexible.
This workflow is one of the best ways to create a transparent background in Photoshop while keeping the subject editable.
How to Remove Background from Product Photos with Clean Edges
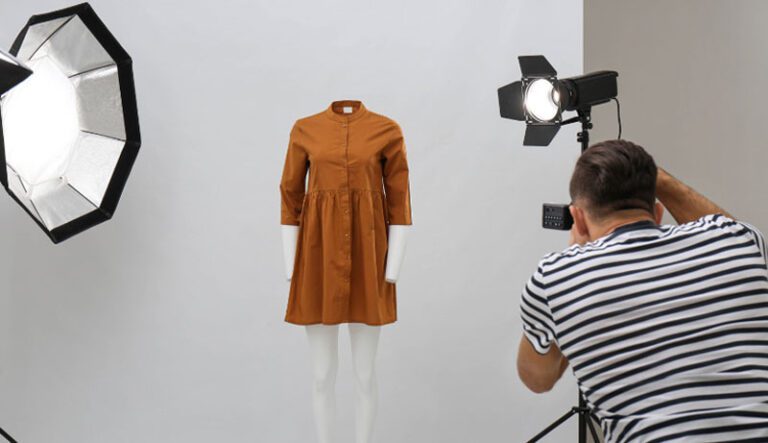
Product photos need a different mindset than casual image editing. In ecommerce, clean edges and consistency matter more than flashy effects.
Here’s a better workflow for product photo background removal:
Use the Right Method for the Product
- Hard-edge products: use the Pen Tool or a precise selection
- Soft-edge products: use Select and Mask
- Simple isolated products: start with Remove Background or Select Subject
Keep Natural Product Shape
Do not cut too tightly if it removes real edges. A product should look clean, not clipped unnaturally.
Watch for Shadow Problems
Removing the background can also remove natural grounding shadows. If needed, rebuild a soft shadow so the product does not look like it is floating.
Check for Color Fringing
When you remove a background, you may see leftover edge color from the original backdrop. Clean that up before exporting.
Use PNG for Transparency
If you want a transparent file, export as PNG. JPEG will not preserve transparency.
Stay Consistent Across the Catalog
If you run an ecommerce store, every product image should feel like part of the same system. The same edge quality, spacing, alignment, and background style make the store look much more polished.
Pen Tool vs Automatic Background Removal
A lot of people ask which option is better. The answer depends on the image and how precise the final result needs to be.
Choose automatic tools when:
- you need speed
- the object is clearly separated from the background
- the image is only for rough use or internal mockups
Choose the Pen Tool when:
- you need crisp, accurate edges
- the product has clean, defined outlines
- the image will be used for ecommerce, print, or ads
- you need consistent bulk editing
For store owners and agencies managing many SKUs, automatic tools are good for starting, but manual refinement is usually what creates professional results.
Common Background Removal Mistakes to Avoid
Even if you know how to remove background in Photoshop, small errors can make the image look amateur.
1. Leaving Jagged Edges
Rough cut lines are one of the biggest quality problems. Always zoom in and inspect the border.
2. Removing Important Details
Thin straps, transparent surfaces, and reflective edges often get lost during automatic selection.
3. Ignoring Edge Contamination
A blue, gray, or green halo around the product can make the cutout obvious.
4. Over-smoothing the Subject
Too much feathering can make products look soft and unrealistic.
5. Exporting in the Wrong Format
Use PNG for transparency. Use JPEG only when a solid background is final.
6. Using One Method for Every Image
Different products need different workflows. A necklace, a pillow, and a glass bottle should not be edited the same way.
When DIY Photoshop Editing Makes Sense
Doing it yourself can work well when:
- you only have a few images
- your products are easy to isolate
- you already know Photoshop basics
- perfection is not critical
- you are testing a new product quickly
For a small batch, DIY editing may be enough. It can also help you understand what quality you want before outsourcing.
When to Use a Professional Background Removal Service
As your store grows, manual editing becomes a bottleneck.
A professional team usually makes more sense when:
- you have bulk product images
- you need consistent results across a catalog
- your products have difficult edges
- you sell on strict marketplaces
- your in-house team needs to save time
- you want cleaner, more polished listing images
Photo Fix Team already positions background removal and ecommerce image editing as core services for brands that want consistent, marketplace-ready visuals.
That’s where outsourcing can save both time and rework.
Practical Workflow for Small Ecommerce Brands
If you want a simple process you can repeat, use this:
For simple images
- Open image in Photoshop
- Click Remove Background
- Inspect edges
- Clean up the mask
- Export PNG or final JPG
For more detailed images
- Use Select Subject
- Open Select and Mask
- Refine the edges
- Output to layer mask
- Correct fringing and add natural shadow if needed
- Export in the final format
For high-volume catalogs
- Separate products by difficulty
- Use quick tools for basic items
- Use Pen Tool or manual masking for complex ones
- Apply consistent spacing and export settings
- Quality-check every batch before publishing
Final Thoughts
Learning how to remove background in Photoshop is a valuable skill, especially if you manage product photos, create marketing visuals, or run an online store.
For quick edits, Photoshop’s automatic tools can get you started fast. For cleaner ecommerce results, tools like Select and Mask Photoshop and manual masking usually produce a more polished finish. The key is not just removing the background, but keeping edges clean, preserving product detail, and creating a consistent look across every image.
If you only edit occasionally, DIY can work. But if you need fast turnaround, clean cutouts, and dependable quality for large batches, professional help is often the smarter move.
Photo Fix Team helps ecommerce photo editing service for brands and growing businesses turn ordinary product images into clean, professional visuals that are ready for stores, listings, and ads.
Frequently Asked Questions
Find answers to commonly asked questions about our products and services.