Ghost mannequin
Create your own
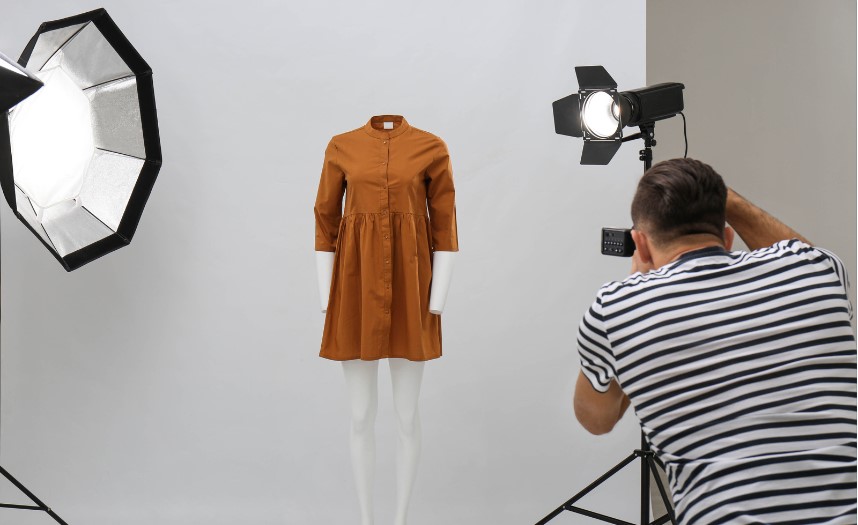
DIY Ghost Mannequin Setup: A Step-by-Step Guide!

Introduction to Ghost Mannequin Photography
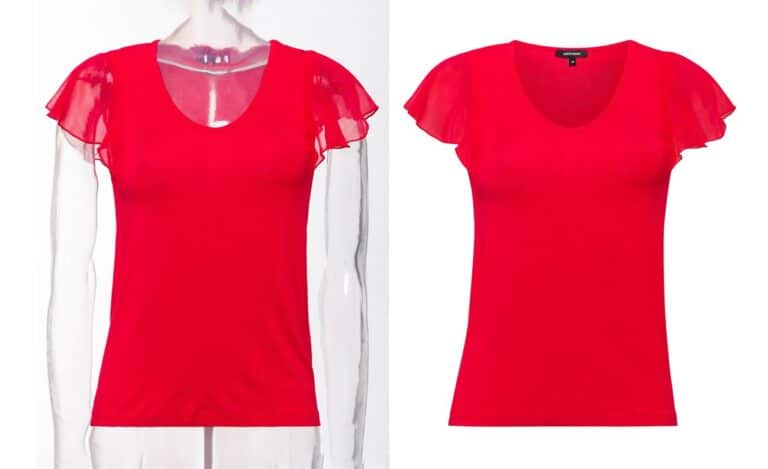
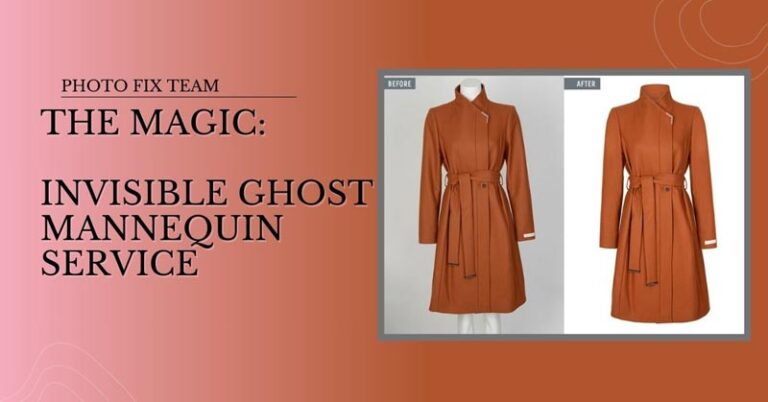
Ghost Mannequin Photography is a revolutionary technique used in the e-commerce and fashion industries. It involves photographing clothes on a mannequin, which is then removed during post-processing to create a lifelike, 3D effect of the apparel. This method is essential for Revolutionizing Product Display with Ghost Mannequins, offering a clean and focused presentation of the product.
Why should businesses use a ghost mannequin for their product photos? The answer lies in the ability to showcase the product in its true form without any distractions. It highlights the fit and style of the clothing, essential for customers who rely on online shopping. Ghost Mannequin Services: A Step-by-Step Guide provides a comprehensive look into how this technique can elevate your product display.

Essential Equipment for Your DIY Ghost Mannequin Setup
To set up your own ghost mannequin photography studio, you’ll need some essential equipment:
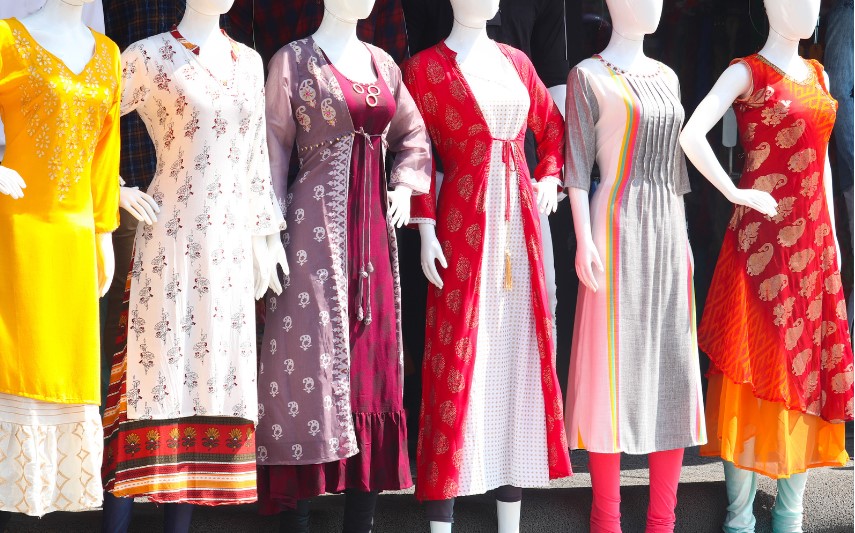
Choosing the Right Mannequin
Selecting the right mannequin is crucial for ghost mannequin photography. It should resemble human proportions as closely as possible to ensure garments fit naturally. For diverse options, check out How to Choose the Right Ghost Mannequin for Your Brand.
Camera and Lens Recommendations
A high-quality DSLR or mirrorless camera paired with a versatile lens can capture sharp and detailed images. For more on the technical aspects, refer to Mastering Ghost Mannequin Photography for Clothing Brands.
Lighting Essentials: Softboxes and Reflectors
Good lighting is key to highlighting the textures and colors of the clothing. Softboxes and reflectors help in evenly distributing light and reducing harsh shadows. Discover more lighting techniques at Maximizing ROI with Ghost Mannequin Service.
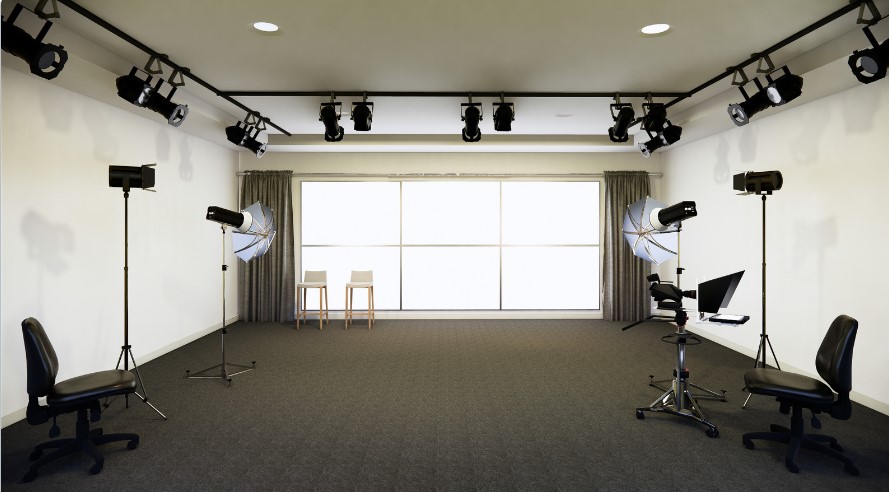
Preparing Your Space: Creating the Ideal Environment
Creating the ideal environment for ghost mannequin photography is about more than just having a camera and a mannequin. It’s about crafting a space that enhances your photography, ensuring every shot is perfect.
Selecting the Right Location
Your shooting space needs to be large enough to accommodate your equipment and allow for easy movement. Preferably, it should have good natural light, though this can be supplemented with artificial lighting. For an in-depth guide, explore What Are the Ways to Master the Art of E-commerce Photography.
Setting Up Your Background
A plain background, typically in white or light grey, is ideal as it won’t distract from the product. This setup aids in easier post-processing, especially when dealing with Background Removal Service.
Managing Natural and Artificial Light
Balancing natural and artificial light is key. You want to avoid harsh shadows and ensure even lighting across the product. For more detailed insights, visit DIY Ghost Mannequin Setup: A Step-by-Step Guide.
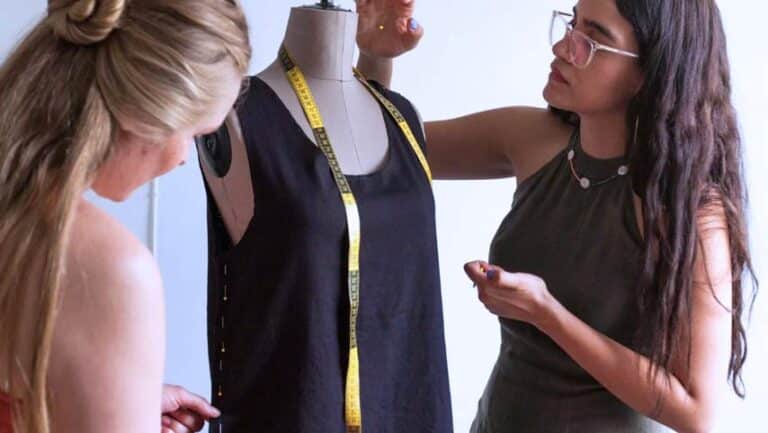
Dressing Your Mannequin: Tips and Tricks
Dressing your mannequin effectively is crucial for ghost mannequin photography. It’s not just about putting clothes on; it’s about bringing out the best in your apparel.
Selecting Garments for Best Results
Choose garments that are representative of your brand’s style and fit well on the mannequin. Photographing textiles requires an eye for detail to ensure the fabric’s texture and color are accurately captured.
The Art of Pinning and Positioning Clothes
To achieve a natural look, pin and adjust the clothes to fit the mannequin snugly. This can create the illusion of a body inside the garment, adding depth to the final image. Learn more about this technique at Ghost Mannequin Photography Technique.
Ensuring Consistency in Style and Fit
Consistency is key in e-commerce. Each product should look uniform in style and fit to give customers a reliable shopping experience. For insights on maintaining consistency, check out Unleashing Creativity with Ghost Mannequin Service.
Camera Settings for Perfect Shots
Achieving the perfect shot in ghost mannequin photography requires a solid understanding of camera settings. These settings are crucial in capturing the intricate details of clothing and textiles.
Aperture, Shutter Speed, and ISO Explained
- Aperture: Controls the depth of field. A narrower aperture (higher f-number) ensures the entire garment is in focus.
- Shutter Speed: Should be fast enough to eliminate motion blur but slow enough to allow sufficient light.
- ISO: Keep it as low as possible to avoid noise. Adjust depending on the lighting conditions.
For a deeper understanding, visit Mastering Ghost Mannequin Photography, which offers expert advice on camera settings.
White Balance and Focus Tips
Set the white balance according to your lighting to ensure the colors in your photographs are accurate. Autofocus can be useful, but manual focus gives you more control, especially when photographing textiles.
Shooting in Manual vs Automatic Mode
Manual mode offers the most control, allowing you to adjust all settings to suit your environment and subject. Automatic modes can be useful for beginners, but for professional results, manual is the way to go. Learn more about these techniques at Ghost Mannequin Photography Near Me.
Lighting Techniques for Ghost Mannequin Photography
Lighting can make or break your ghost mannequin photographs. It’s about creating the right mood and showcasing the product in the best possible way.
Key Light and Fill Light Basics
- Key Light: The main light source, usually positioned in front of the mannequin.
- Fill Light: Used to eliminate shadows caused by the key light, typically placed opposite the key light.
For more detailed information, the article Ghost Mannequin Service: Revolutionizing Product Display offers great insights into lighting setups.
Using Reflectors and Diffusers Effectively
Reflectors bounce light back onto the product, reducing shadows and highlighting details. Diffusers soften the light, ensuring even illumination. This is particularly important when Photographing Textiles.
Creating Depth and Dimension with Shadows
Proper use of shadows can add depth and a sense of realism to your ghost mannequin images. It’s about finding the right balance between light and dark to make the product stand out. For advanced tips, check out Ghost Mannequin Photography Technique.
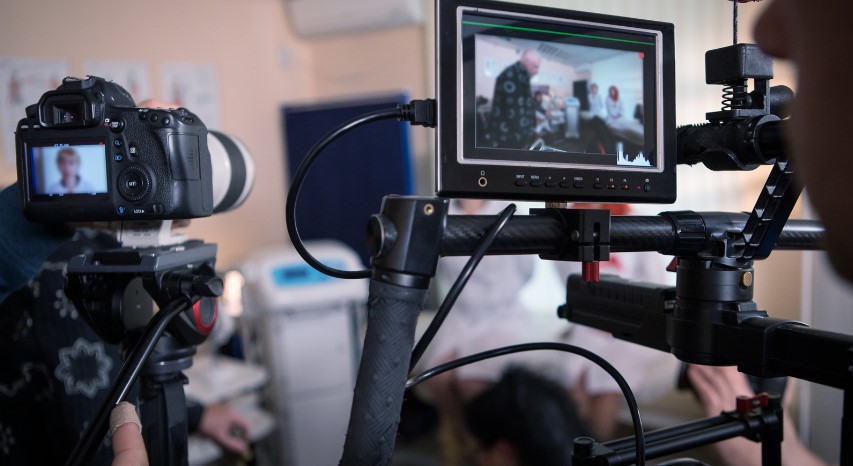
The Shooting Process: Step-by-Step Guide
The shooting process in ghost mannequin photography involves more than just taking pictures. It’s a crafted approach to ensure every detail of the garment is captured flawlessly.
Positioning Your Mannequin and Camera
Place the mannequin in a position that naturally showcases the garment. The camera should be at the eye level of the mannequin for a natural perspective. For detailed positioning techniques, explore Ghost Mannequin vs. Live Model.
Framing Your Shots: Guidelines and Composition
Use the rule of thirds for a balanced composition. Ensure the entire garment is in the frame, and consider leaving some negative space for text or other design elements in post-processing. Learn more about framing in Ghost Mannequin Photography Service.
Multiple Angles: Capturing Every Detail
Capture multiple angles to provide a comprehensive view of the garment. This includes front, back, and side views, as well as close-ups of any special details or textures. Mastering Ghost Mannequin Photography offers insights into capturing these essential angles.
Post-Processing Magic: Bringing Your Photos to Life
Post-processing is where the magic happens in ghost mannequin photography, transforming good photos into great ones.
Basic Editing Tools and Software Recommendations
Use software like Adobe Photoshop for editing. Basic adjustments include exposure, contrast, and color balance. For software recommendations, check out The Best Photo Editing Software for Beginners.
Retouching Techniques: Removing Blemishes and Wrinkles
Retouching is crucial in ghost mannequin photography. It involves removing wrinkles, blemishes, and any unwanted shadows to create a clean look. For advanced retouching techniques, visit High-End Retouching.
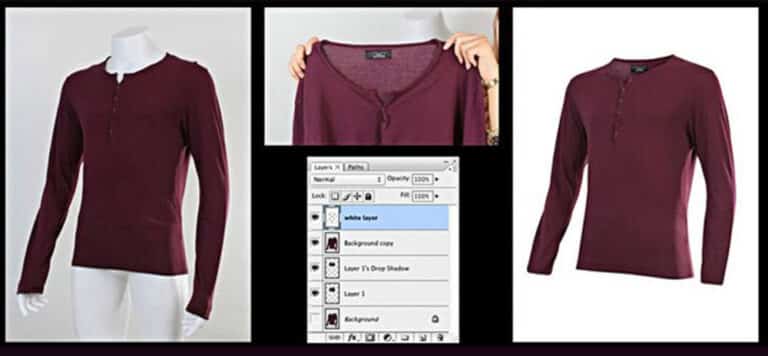
Creating the ‘Ghost’ Effect: Advanced Editing Tips
The ghost effect is achieved by removing the mannequin in post-processing, which makes the garment appear as if it is floating. This requires skills in layering and masking. Learn more about this effect at Ghost Mannequin Photo Editing Services.
Troubleshooting Common Issues in Ghost Mannequin Photography
Even with meticulous planning, ghost mannequin photography can present unique challenges. Addressing these effectively is key to maintaining high-quality imagery.
Dealing with Reflections and Glare
Reflections and glare can detract from the clarity of the image. Use polarizing filters or adjust the lighting angles to minimize these issues. For more solutions, delve into 3 Mistakes to Avoid in Ghost Mannequin Photography.
Adjusting for Uneven Lighting
Uneven lighting can cause inconsistent shadows and highlights. Use diffusers and reflectors to balance the light. Additional tips can be found in Mastering Ghost Mannequin Photography for Clothing Brands.
Solving Fitting and Positioning Problems
If clothes don’t fit the mannequin properly, use pins and clamps discreetly to create a natural shape. For more on fitting techniques, check out Ghost Mannequin Photography Technique.

Styling and Creative Ideas for Ghost Mannequin Photos
Injecting creativity into your ghost mannequin photos can set your brand apart and attract more customers.
Experimenting with Different Fabrics and Textures
Different fabrics and textures can add depth and interest to your images. Experiment with lighting and angles to best showcase these features. Explore innovative ideas at Unleashing Creativity with Ghost Mannequin Service.
Playing with Colors and Patterns
Use color theory to create visually appealing images. Complementary colors and patterns can enhance the overall look of your product photos. For color correction tips, visit Color Correction Service.
Innovative Poses and Arrangements
Try different poses and arrangements to showcase the versatility of the clothing. This can include layering pieces or showing different styling options. Get inspired by Ghost Mannequin vs. Live Model.
Maximizing Efficiency: Tips for Speed and Productivity
In ghost mannequin photography, efficiency is key to managing a high volume of products without sacrificing quality. Here are some tips to streamline your workflow:
Batch Shooting Techniques
Batch shooting involves photographing similar products in a sequence, reducing the time needed for setup changes. This method is particularly effective when dealing with a large inventory. For more on efficient shooting strategies, explore The Untold Benefits and Intricacies of Ghost Mannequin Services.
Organizing Your Workflow
Organize your workflow from shooting to editing. This can include sorting clothes by type, pre-setting your camera for different garments, and using templates for post-processing. Efficient workflow tips can be found in Ghost Mannequin Service: Boost Online Sales.
Time-Saving Editing Shortcuts
Leverage editing software shortcuts and batch processing to speed up the post-production phase. Tools like Adobe Photoshop offer actions and scripts that can automate repetitive tasks. For more on editing efficiency, visit Ghost Mannequin Photoshop.
Cost-Effective Solutions for Small Businesses
Creating a ghost mannequin setup doesn’t have to break the bank, especially for small businesses and startups. Here are some budget-friendly solutions:
DIY Equipment Hacks and Alternatives
You don’t always need expensive equipment to get started. DIY solutions, like using household lamps for lighting or crafting a homemade backdrop, can be surprisingly effective. For creative DIY ideas, check out DIY Ghost Mannequin Setup: A Step-by-Step Guide.
Budget-Friendly Mannequin Options
Instead of investing in high-end mannequins, look for affordable options or consider renting. There are various types of mannequins available that are both cost-effective and suitable for ghost photography. For affordable options, refer to Ghost Mannequin for Sale.
Free and Affordable Editing Software
While professional software like Adobe Photoshop is the industry standard, there are free or less expensive alternatives that are quite capable, such as GIMP or Canva. These can be great options for businesses starting out. For software recommendations, visit Ghost Mannequin Photo Editing Services.

Building a Portfolio with Your Ghost Mannequin Images
Creating a compelling portfolio is essential for attracting clients and showcasing your skills in ghost mannequin photography. Here’s how you can build an impressive portfolio:
Selecting and Curating Your Best Work
Choose images that best represent your skill and style. Include a variety of garments and angles to show your versatility. For ideas on selecting the best work, visit Why Top Brands Choose Ghost Mannequin Service.
Tips for Online Presentation and Marketing
Create an online portfolio that is easy to navigate and visually appealing. Use high-quality images and include descriptions of your work. Leverage social media platforms to reach a wider audience. For more on online marketing, explore A Day in the Life of a Ghost Mannequin Photographer.
Leveraging Social Media and E-commerce Platforms
Utilize platforms like Instagram and Pinterest to showcase your ghost mannequin images. Engage with your audience and use relevant hashtags to increase visibility. For strategies on leveraging e-commerce platforms, check out Ghost Mannequin Service: Revolutionizing Product Display.
Advanced Techniques for Seasoned Photographers
For photographers looking to take their ghost mannequin photography to the next level, here are some advanced techniques:
Exploring Mixed Lighting Scenarios
Experiment with different lighting setups, like using colored gels or combining natural and artificial light for unique effects. For more on advanced lighting, visit Mastering Ghost Mannequin Photography.
Incorporating Props and Additional Elements
Use props to add context or tell a story with your product photos. This can involve anything from simple accessories to elaborate setups. Learn more about using props in Ghost Mannequin vs. Live Model.
Challenging Fabrics: Working with Sheer and Reflective Materials
Photographing challenging fabrics like sheer or reflective materials requires special techniques to accurately capture their texture and appearance. Discover tips on handling these materials in Photographing Textiles.
Conclusion: Taking Your DIY Ghost Mannequin Photography to the Next Level
As we conclude our comprehensive guide on DIY ghost mannequin photography, let’s recap the key takeaways and look at how you can continue to grow and innovate in this field.
Recap of Key Takeaways
- Understanding Equipment and Setup: Mastery of the right equipment, from choosing the right mannequin to setting up effective lighting, is fundamental.
- Shooting and Post-Processing Skills: Developing a keen eye for shooting angles and honing your post-processing skills are crucial for high-quality results.
- Creative and Marketing Strategies: Employing creative styling and effective online marketing can significantly enhance your brand’s online presence.
For a holistic overview, Ghost Mannequin: The Future of E-commerce Product Photography offers insights into the evolving trends in this niche.
Further Learning Resources and Communities
Continuous learning is key in the ever-evolving field of photography. Engage with online communities, participate in workshops, and keep up with resources like PhotographyLife.com and ThePhoblographer.com for the latest tips and trends.
Encouragement to Experiment and Innovate
Finally, don’t be afraid to experiment. Try new techniques, explore different software, and push the boundaries of traditional ghost mannequin photography. Innovation is often born from experimentation.