
Choosing the Right Tools for Editing
Understanding Different Editing Tools
When it comes to editing passport photos, selecting the right tools is paramount. Various software programs offer different features tailored to different levels of expertise. Beginners might find simpler tools easier to use, while professionals might prefer advanced software for more precision and control.
Software Options: Free vs. Paid
You’ll find a wide array of software options ranging from free to paid. Free software often covers basic needs and includes tools like Paint and online editors. However, paid software such as Adobe Photoshop provides advanced functionalities like layer manipulation and detailed retouching, offering a professional touch.
Online vs. Offline Editing
Online editing tools are convenient and accessible from any device with an internet connection. Websites like www.epassportphoto.com provide free, user-friendly interfaces. Offline tools, such as Photoshop and Canva, offer robust features and greater control, allowing you to work without internet interruptions.
Mobile vs. Desktop Editing
Mobile editing apps like Snapseed and PicsArt provide on-the-go convenience and are ideal for quick edits. Desktop software, on the other hand, generally offers more advanced tools and a larger workspace, which is beneficial for detailed editing and professional-grade results.
User-Friendly Tools for Beginners
For those new to photo editing, user-friendly tools are essential. Canva, for instance, offers intuitive drag-and-drop features and templates. Apps like Lightroom Mobile provide easy-to-use sliders for adjustments, making it simple for beginners to achieve professional-looking edits.
Preparing for the Perfect Shot
Choosing the Right Background
A plain, light-colored background is crucial for passport photos. Avoid patterns and textures. White or light blue backgrounds are typically preferred and ensure your photo meets official guidelines.
Lighting Tips for Passport Photos
Good lighting is key. Natural light is best, so aim to take your photo near a window. If using artificial light, use soft, even lighting to avoid harsh shadows. Ensure the light source is in front of you, not behind, to avoid casting shadows on your face.
Clothing Guidelines: What to Wear
Opt for professional attire. Solid, dark-colored clothing contrasts well with the background. Avoid wearing white or light colors that blend with the background. If your country allows, adding a blazer can enhance the photo’s professional appearance.
Posing for Your Passport Photo
Stand or sit up straight with a neutral expression. Both eyes should be open, and your mouth closed. Avoid tilting your head and ensure your entire face is visible. Look directly at the camera for a straightforward shot.
Common Mistakes to Avoid
Avoid common pitfalls such as uneven lighting, cluttered backgrounds, and inappropriate clothing. Ensure your photo is not blurry and adheres to the required dimensions. Double-check that your face is centered and clearly visible.
Taking the Photo: Best Practices
Using Your Smartphone Camera
Smartphones today have excellent cameras. Use the back camera for better resolution. Ensure good lighting, hold the phone steady, and use a timer or a tripod to prevent any movement.
How to Edit Passport Size Photo in iPhone
iPhones come with built-in editing tools. After taking your photo, use the Photos app to crop to the correct size, adjust brightness and contrast, and remove any blemishes. iPhone’s portrait mode can also help blur the background for a professional look.
How to Edit Passport Size Photo in Mobile
Similar to iPhones, other smartphones also have editing capabilities. Apps like PicsArt or Snapseed provide comprehensive editing tools right on your mobile device. These apps offer features like cropping, adjusting brightness, and correcting colors.
How to Edit Passport Photo on Laptop
Editing on a laptop provides a larger workspace. Software like GIMP, a free alternative to Photoshop, offers robust editing tools. Import your photo, use the crop tool to get the right size, adjust colors, and remove any imperfections.
Using a Digital Camera for Passport Photos
Digital cameras often provide higher resolution than smartphones. Use a tripod and ensure proper lighting. Transfer the photo to your computer for editing. Software like Photoshop or Paint.net can help you crop, adjust lighting, and ensure the photo meets official standards.
Editing Basics: Getting Started
Cropping Your Photo to the Right Size
Start by cropping your photo to the required dimensions. Most passport photos are 2×2 inches. Use the cropping tool in your chosen software to ensure your face fits within the specified area and maintains the correct aspect ratio.
Adjusting Brightness and Contrast
Proper brightness and contrast are essential for a clear photo. Increase brightness if the photo is too dark and adjust contrast to make the features stand out. Avoid over-editing, which can make the photo look unnatural.
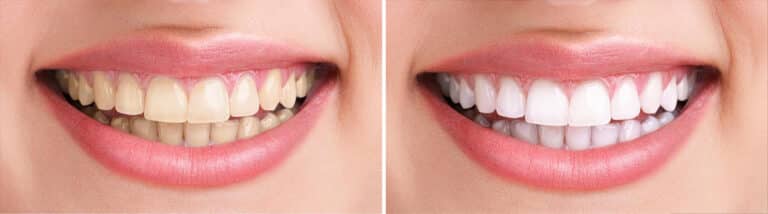
Removing Red-Eye and Blemishes
Red-eye can be easily removed using tools available in most editing software. Additionally, blemish removal tools can help you achieve a clean look. Focus on minor corrections to maintain a natural appearance.
Correcting Color and White Balance
Adjust the color balance to ensure skin tones appear natural. Use the white balance tool to correct any color casts caused by lighting. This step ensures the photo looks professional and meets official requirements.
Ensuring Proper Resolution and Quality
High resolution is crucial for a clear and detailed photo. Aim for a resolution of at least 300 DPI. Avoid compressing the photo excessively, as this can reduce quality and make the image look pixelated.
Using Photoshop for Professional Edits
How to Edit a Passport Size Photo in Photoshop
Photoshop is the gold standard for photo editing. Open your photo in Photoshop by selecting “File” and then “Open.” Choose the crop tool and set the dimensions to 2×2 inches. Ensure the resolution is set to at least 300 DPI for high-quality output. Use the brightness and contrast sliders under the “Image” menu to enhance the image. Apply the healing brush or clone stamp tool to remove any blemishes or imperfections on the skin. Adjust the white balance by selecting “Image,” then “Adjustments,” and “Color Balance” to make sure skin tones are natural. Save your edited photo in a high-resolution format, such as JPEG or PNG, for printing.
Step-by-Step Guide to Photoshop Editing
- Open the Image: Launch Photoshop, go to “File,” select “Open,” and choose your passport photo.
- Crop the Image: Select the crop tool from the toolbar. Set the crop dimensions to 2×2 inches. Make sure the resolution is at least 300 DPI.
- Adjust Brightness and Contrast: Go to “Image,” select “Adjustments,” and then “Brightness/Contrast.” Use the sliders to adjust until the photo looks well-lit and balanced.
- Remove Imperfections: Use the healing brush tool to remove any blemishes or marks. Click on the blemish and drag the brush over the area to blend it with the surrounding skin.
- Correct Color Balance: Go to “Image,” select “Adjustments,” and then “Color Balance.” Adjust the sliders for shadows, midtones, and highlights to achieve a natural skin tone.
- Save the Image: Save your edited photo by going to “File” and selecting “Save As.” Choose JPEG or PNG format for high-quality results.
Advanced Photoshop Techniques
For more sophisticated edits, Photoshop offers advanced techniques such as using layers and masks. Create a duplicate layer of your photo to work non-destructively. Use masks to selectively edit parts of the image without affecting the entire photo. For example, you can use a mask to adjust the brightness of the background separately from the subject.
Adding a Blazer in Photoshop
To add a blazer, first, find an image of a blazer with a transparent background. Open it in Photoshop and place it on top of your photo. Use the transform tool (Ctrl+T or Cmd+T) to resize and position the blazer over your shoulders. Use the eraser tool to blend the edges and ensure it looks natural.
Editing the Background in Photoshop
Changing the background in Photoshop involves selecting the subject and removing the existing background. Use the quick selection tool to outline your subject. Once selected, click on “Select and Mask” to refine the edges. Choose “Output To: New Layer with Layer Mask” and click “OK.” Now, you can add a new background layer behind your subject. Use the gradient tool or solid color fill to create a uniform background.
Editing with Canva: A Creative Approach
How to Edit Passport Size Photo in Canva
Canva is a user-friendly graphic design tool that simplifies photo editing. Start by creating a new design with custom dimensions (2×2 inches). Upload your passport photo and drag it onto the canvas. Use the crop tool to adjust the size. Canva’s adjustment tools allow you to fine-tune brightness, contrast, and color balance. Use the blur tool to soften the background if necessary.
Step-by-Step Guide to Canva Editing
- Create a New Design: Open Canva, click on “Create a Design,” and select “Custom Dimensions.” Set the dimensions to 2×2 inches.
- Upload Your Photo: Click on the “Uploads” tab and upload your passport photo. Drag it onto the canvas.
- Crop the Image: Select the photo, click on the crop icon, and adjust the cropping frame to fit the 2×2 inch size.
- Adjust Brightness and Contrast: Use the adjustment tools to tweak brightness, contrast, and color balance until the photo looks natural.
- Save Your Design: Once satisfied with the edits, click on “Download” and choose your preferred file format (JPEG or PNG).
Adding Text and Graphics in Canva
Canva also allows you to add text and graphics to your photo. Click on the “Text” tab, choose a font, and type in your name or any required information. Adjust the size, color, and position of the text to ensure it doesn’t obscure your face. Use Canva’s graphic elements to add decorative touches if needed.
Using Canva Templates for Passport Photos
Canva offers pre-made templates specifically designed for passport photos. These templates are sized correctly and include placeholders for your photo. Simply upload your image, drag it into the template, and adjust as necessary. This ensures your photo meets the required specifications.
Exporting Your Finished Photo from Canva
Once your photo is edited, exporting it is straightforward. Click on the “Download” button, select the desired file format (JPEG or PNG), and ensure the quality is set to high. Save the file to your device, ready for printing or digital submission.
Mobile Apps for Quick Edits
Best Apps to Edit Passport Photos
There are several mobile apps that make editing passport photos a breeze. Some of the best include:
- Snapseed: Offers comprehensive editing tools and filters.
- PicsArt: Known for its creative editing features.
- Lightroom Mobile: Provides professional-grade adjustments.
- Photo Editor by Aviary: User-friendly with robust editing options.
- Passport Photo Maker: Specifically designed for passport photos.
How to Edit Passport Size Photo in PicsArt
PicsArt provides a versatile platform for editing passport photos on your mobile device. Start by opening your photo in PicsArt. Use the crop tool to set the dimensions to 2×2 inches. Adjust the brightness and contrast using the app’s intuitive sliders. Use the blemish removal tool to touch up any imperfections. Save your edited photo in high resolution.
Using Snapseed for Passport Photos
Snapseed, developed by Google, is a powerful editing app. Open your photo in Snapseed and use the “Tune Image” feature to adjust brightness, contrast, and color balance. The “Healing” tool can remove blemishes or unwanted spots. Use the crop tool to size the image to 2×2 inches. Save the photo in high resolution for printing.
Editing Passport Photos in Lightroom Mobile
Lightroom Mobile offers professional editing tools on your smartphone. Import your photo into Lightroom. Use the crop tool to adjust the size. The “Light” panel allows you to fine-tune exposure, contrast, and highlights. Use the “Detail” panel to enhance sharpness and reduce noise. Save your edited photo in the highest quality available.
Auto Edit Passport Photo Apps
Auto edit apps simplify the process by automating adjustments. Apps like “Passport Photo Maker” or “ID Photo” automatically crop and adjust your photo to meet passport standards. These apps often include background removal and blemish correction features, providing a quick and easy solution for passport photo editing.
Free Online Tools for Editing
How to Edit Passport Size Photo Online Free
Several websites offer free tools for editing passport photos. Websites like www.epassportphoto.com and idphoto4you.com provide easy-to-use interfaces for cropping and adjusting your photo. Simply upload your image, follow the on-screen instructions, and download your edited photo for free.
Top Free Online Editing Websites
Here are some top free online editing websites:
- www.epassportphoto.com: User-friendly with automated cropping and adjustments.
- idphoto4you.com: Offers multiple country templates and guidelines.
- Fotor: Comprehensive editing tools with easy-to-use features.
- BeFunky: Intuitive interface with essential editing tools.
- Pixlr: Advanced editing options similar to Photoshop.
Using www.epassportphoto.com
This website specializes in passport photos. Upload your photo, select the country and document type, and follow the guided steps. The website automatically crops and adjusts your photo to meet the specified requirements. Download the final image for free, ready for printing or submission.
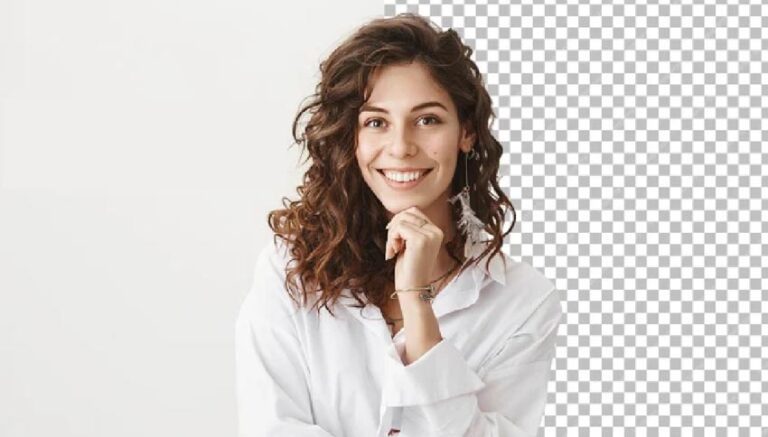
Online Background Removal Tools
Removing the background online is simple with tools like Remove.bg or Clipping Magic. Upload your photo, and these tools will automatically detect and remove the background. You can then replace it with a solid color or leave it transparent. Download the edited image and use it for your passport photo.
Edit Passport Photo Online Free: Tips and Tricks
When editing passport photos online, ensure you follow these tips:
- Use high-resolution images for better results.
- Double-check the dimensions and resolution requirements for your country.
- Avoid over-editing to maintain a natural appearance.
- Use tools with automated features for quick and accurate adjustments.
- Always download and save your edited photo in high resolution.
Editing Passport Photos in Paint
How to Edit Passport Size Photo in Paint
Paint, a simple and widely accessible tool, is often underestimated for photo editing. Start by opening your photo in Paint. Use the “Select” tool to outline the part of the image you want to keep. Click on “Crop” to trim the photo to the desired size, typically 2×2 inches. Use the “Resize” option to ensure the image meets the required dimensions. Adjust colors and brightness using the “Adjust Color” option to enhance the photo’s clarity. Save the image in a high-resolution format.
Basic Paint Editing Techniques
- Opening the Image: Launch Paint, go to “File,” select “Open,” and choose your photo.
- Selecting and Cropping: Use the “Select” tool to outline the photo’s main subject. Click “Crop” to remove the unwanted areas.
- Resizing the Image: Click on “Resize,” choose “Pixels,” and set both width and height to 600 pixels to maintain high resolution.
- Adjusting Brightness and Colors: Use the “Adjust Color” feature to tweak brightness, contrast, and color balance.
- Saving the Image: Save the edited photo by going to “File,” selecting “Save As,” and choosing JPEG or PNG for high quality.
Using Paint for Cropping and Resizing
Paint makes cropping and resizing straightforward. Select the portion of the image you need, click “Crop,” and then use the “Resize” tool to set the precise dimensions. Ensure the “Maintain aspect ratio” box is checked to avoid distortion. This method is perfect for achieving the exact size required for passport photos.
Adjusting Colors and Brightness in Paint
To adjust colors and brightness in Paint, go to the “Adjust Color” section. Here, you can modify the image’s brightness, contrast, and color balance. This helps in enhancing the overall appearance and ensuring the photo meets passport standards. Small adjustments can make a significant difference in the final quality.
Saving and Exporting Your Photo from Paint
After editing, save your photo in a high-quality format. Go to “File,” select “Save As,” and choose either JPEG or PNG. These formats preserve the image quality, making it suitable for printing or digital submission. Ensure the resolution is high enough (at least 300 DPI) to meet passport photo requirements.
Ensuring Compliance with Passport Photo Standards
Understanding Passport Photo Requirements
Each country has specific requirements for passport photos. Common standards include size (usually 2×2 inches), a plain white or light-colored background, and specific head size and position guidelines. Familiarize yourself with these requirements to ensure your photo is compliant and won’t be rejected.
Checking Photo Dimensions and Sizes
Ensure your photo matches the required dimensions. Most passport photos need to be 2×2 inches, but some countries have different specifications. Use a ruler or photo editing software to check the dimensions. Verify that the head size and position fall within the required range.
Ensuring Background Compliance
The background of a passport photo should be plain white or light-colored. No patterns or shadows should be visible. Use photo editing software to adjust the background if necessary. Many tools offer background removal and replacement features to help meet this requirement.
Avoiding Shadows and Reflections
Shadows and reflections can lead to photo rejection. Ensure even lighting when taking the photo, avoiding harsh shadows on the face or background. If shadows are present, use photo editing software to lighten them. Reflections on glasses should be minimized or removed.
Verifying Final Photo Quality
Before submitting, check the photo’s quality. Ensure it is clear, in focus, and free of any marks or blemishes. The photo should be in high resolution (at least 300 DPI) and printed on photo-quality paper if submitting a physical copy. Digital submissions should be in the correct file format and resolution.
Adding Names and Dates to Your Photo
How to Edit Passport Size Photo with Name
Adding names and dates to a passport photo is sometimes required for specific documents. Use photo editing software to add text. Ensure the text is clear and does not obscure any part of the face. Place the text below the chin or above the head, depending on the guidelines.
Using Text Tools in Various Editors
Most photo editing tools, including Photoshop, Canva, and Paint, offer text tools. Select the text tool, choose an appropriate font and size, and type the required information. Position the text carefully to ensure it doesn’t interfere with the subject’s face.
Ensuring Proper Placement of Text
Proper placement of text is crucial. The text should not cover any part of the face or essential features. Place it in a clear area, such as below the chin or above the head. Ensure it is easily readable and contrasts well with the background.
Choosing the Right Font and Size
Select a font that is clear and easy to read. Sans-serif fonts like Arial or Helvetica are good choices. The font size should be large enough to be readable but not so large that it dominates the photo. Test different sizes to find the best balance.
Avoiding Text Overlap with the Face
Ensure the text does not overlap with the face or any important features. Use photo editing tools to adjust the text position if needed. It’s essential to maintain the photo’s integrity while adding necessary information.
Editing for Specific Countries
Editing Passport Photos for the US
US passport photos must be 2×2 inches with a white background. The head must measure between 1 and 1 3/8 inches from the bottom of the chin to the top of the head. Ensure no shadows, hats, or glasses unless medically necessary. Use photo editing tools to adjust brightness, contrast, and background.
UK Passport Photo Requirements
UK passport photos require a 35mm x 45mm size with a plain cream or light grey background. The head should measure between 29mm and 34mm. Ensure a neutral expression, closed mouth, and no head coverings unless for religious or medical reasons. Edit for proper dimensions and background compliance.
Editing Passport Photos for Malaysia
Malaysian passport photos should be 35mm x 50mm with a white background. The head size should be between 25mm and 30mm from the chin to the crown. Ensure no shadows, and the face must be fully visible. Use editing tools to meet these specifications.
Canadian Passport Photo Standards
Canadian passport photos must be 50mm x 70mm with a white or light-colored background. The head size should be between 31mm and 36mm. Ensure a neutral expression, no glasses, and no shadows. Edit to adjust brightness, contrast, and dimensions accordingly.
Editing for Schengen Visa Photos
Schengen visa photos should be 35mm x 45mm with a light background. The head must occupy 32mm to 36mm of the photo. Ensure no head coverings, a neutral expression, and no shadows. Use editing tools to crop, resize, and adjust the photo to meet these requirements.
Editing for Different Document Types
Passport vs. Visa Photos
While passport and visa photos share similarities, they often have distinct requirements. Passport photos usually have stricter guidelines regarding size and background. Visa photos may vary by country and visa type. Always check the specific requirements and edit your photo accordingly.
Green Card Photo Editing
Green card photos must be 2×2 inches with a white or off-white background. The head size should be between 1 and 1 3/8 inches. Ensure no shadows, hats, or glasses unless medically necessary. Use photo editing tools to adjust brightness, contrast, and dimensions.
Biometric Photo Standards
Biometric photos require precise dimensions and facial positioning. The head must be centered, with the face occupying a specific percentage of the photo. Ensure even lighting and no shadows. Use editing tools to adjust for exact measurements and clarity.
Editing for ID Cards and Badges
ID card and badge photos often have specific size and background requirements. Ensure the photo is clear, with a neutral expression and no head coverings. Use editing tools to crop, resize, and adjust the photo to meet the specific guidelines.
Customizing Photos for Different Uses
Different documents require different photo specifications. Always check the requirements for the specific document you are preparing. Use photo editing tools to customize the photo’s size, background, and other attributes to meet these specific needs.
Advanced Editing Techniques
Using Layers and Masks in Photoshop
Layers and masks in Photoshop allow for non-destructive editing. Create a duplicate layer to make changes without altering the original image. Use masks to apply edits to specific areas of the photo. This technique is useful for advanced retouching and background changes.
Background Replacement Techniques
Replacing the background involves selecting the subject and removing the existing background. Use tools like the quick selection tool and layer masks in Photoshop. Choose a new background that meets the required specifications and blend it seamlessly with the subject.
Adding Professional Finishing Touches
Professional touches include fine-tuning brightness, contrast, and color balance. Use the dodge and burn tools to highlight and shadow areas for a more polished look. Ensure the final image is crisp and clear, ready for submission.
Retouching for a Polished Look
Retouching involves removing blemishes, smoothing skin, and enhancing features. Use tools like the healing brush, clone stamp, and frequency separation techniques in Photoshop. Aim for a natural look that meets official guidelines without over-editing.
Advanced Color Correction
Color correction ensures the photo looks natural and meets passport standards. Use tools like curves, levels, and color balance in Photoshop. Adjust the white balance to correct any color casts and ensure accurate skin tones.
Troubleshooting Common Issues
Fixing Blurry Photos
Blurry photos are often caused by camera shake or incorrect focus. Use sharpening tools in your editing software to enhance the photo’s clarity. If the blur is too severe, retake the photo with a stable camera and proper focus.
Correcting Underexposed Images
Underexposed images appear dark and lack detail. Use the brightness and exposure tools in your editing software to lighten the image. Adjust the shadows and highlights to bring out details and ensure the photo meets the required standards.
Dealing with Shadows and Glares
Shadows and glares can obscure facial features and lead to photo rejection. Use photo editing tools to lighten shadows and reduce glares. Adjust the overall lighting balance to ensure even illumination across the photo.
Adjusting Unnatural Skin Tones
Unnatural skin tones can result from poor lighting or incorrect white balance. Use the color correction tools in your editing software to adjust the skin tones. Ensure the final image looks natural and meets official guidelines.
Repairing Damaged Photos
Damaged photos can be repaired using cloning and healing tools in your editing software. Remove scratches, spots, and other imperfections. For significant damage, consider using advanced restoration techniques or retaking the photo.
Printing Your Passport Photos
Best Practices for Printing Passport Photos
When printing passport photos, use high-quality photo paper and a reliable printer. Ensure the photo is printed at the correct size and resolution. Check the print settings to match the photo’s dimensions and quality requirements.
How to Print Passport Photos on 4×6 Paper
Print multiple passport photos on a single 4×6 paper to save resources. Use photo editing software to arrange the photos on the paper, ensuring they meet the required dimensions. Cut the photos accurately after printing to ensure compliance.
Choosing the Right Paper and Printer
Select photo-quality paper and a high-resolution printer for the best results. Glossy or matte photo paper is suitable for passport photos. Ensure the printer is set to the highest quality settings to produce clear, sharp images.
Adjusting Print Settings for Best Results
Adjust the printer settings to match the photo’s resolution and size. Use the correct paper type setting in the printer options. Ensure the photo is printed at 300 DPI or higher to maintain quality and detail.
DIY vs. Professional Printing Services
Decide whether to print the photos yourself or use a professional service. DIY printing is cost-effective but requires careful attention to quality and compliance. Professional services ensure high-quality prints that meet official standards.
Ensuring Photo Authenticity
Avoiding Over-Editing
Over-editing can make the photo look unnatural and lead to rejection. Make subtle adjustments and ensure the photo retains a natural appearance. Follow the guidelines to avoid altering essential features or over-enhancing the image.
Maintaining Natural Appearance
Maintain the photo’s natural look by avoiding excessive retouching. Focus on enhancing clarity and correcting minor imperfections. Ensure the final image looks like a true representation of the person.
Understanding Photo Verification
Photo verification involves checking the photo for compliance with official guidelines. Ensure the photo meets all size, background, and quality requirements. Use tools like the US State Department’s photo tool for verification.
Ensuring Consistency with Official Guidelines
Follow the specific guidelines for passport photos to ensure acceptance. Check the official website for the latest requirements and standards. Verify the photo against these guidelines before submission.
Preparing for Photo Submission
Prepare the photo for submission by ensuring it meets all requirements. Print or save the photo in the correct format and resolution. Double-check the quality and compliance before submitting it with your passport application.
Editing for Different Background Colors
How to Edit Passport Photo Blue Background Free
Use photo editing software to change the background to blue. Select the subject and remove the existing background using tools like quick selection or magic wand. Replace the background with a solid blue color and blend it seamlessly.
Changing Backgrounds in Photoshop
In Photoshop, use the quick selection tool to select the subject and create a mask. Remove the existing background and add a new layer with the desired color. Adjust the edges to blend the subject smoothly into the new background.
Using Online Background Tools
Online background tools can simplify the process. Upload your photo to websites like Remove.bg or Fotor. Use their background removal and replacement features to change the background to the required color.
Ensuring Background Uniformity
Ensure the background is uniform and free of patterns or shadows. Use photo editing tools to smooth out any inconsistencies. A clean, uniform background enhances the photo’s compliance and professional appearance.
Avoiding Common Background Mistakes
Common mistakes include uneven lighting, shadows, and patterned backgrounds. Ensure the background is a solid, uniform color with no distractions. Use photo editing tools to correct any issues and maintain compliance.
Legal and Ethical Considerations
Can You Edit Passport Photo?
Editing passport photos is permissible to some extent. Minor adjustments like brightness, contrast, and background changes are acceptable. Avoid altering facial features or adding elements that could misrepresent the person.
Understanding Legal Restrictions
Legal restrictions vary by country. Familiarize yourself with the specific regulations regarding passport photo editing. Ensure your edits comply with these regulations to avoid rejection or legal issues.
Ethical Editing Practices
Maintain ethical standards by avoiding over-editing and misrepresentation. Ensure the photo is a true representation of the person. Ethical editing builds trust and ensures the photo’s acceptance.
Avoiding Misrepresentation
Misrepresentation through editing can lead to legal consequences and photo rejection. Avoid altering essential features or adding elements that change the person’s appearance. Ensure the final image is accurate and compliant.
Preparing for Official Use
Prepare the photo for official use by ensuring it meets all guidelines and standards. Double-check the edits for compliance and quality. Submit the photo confidently, knowing it meets the required specifications.
Creating a Professional Portfolio
Showcasing Your Editing Skills
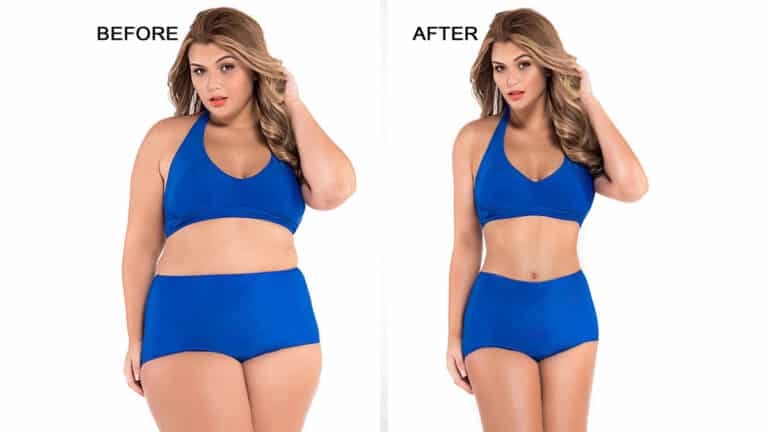
Create a portfolio to showcase your editing skills. Include before and after comparisons to highlight your expertise. Display a variety of edited passport photos to demonstrate your versatility.
Creating Before and After Comparisons
Before and after comparisons effectively showcase your editing abilities. Highlight the improvements made while maintaining compliance with guidelines. Use these comparisons in your portfolio to attract potential clients.
Building a Client Portfolio
Build a portfolio by including work done for clients. Obtain permission to use their photos and showcase the edits made. A diverse client portfolio demonstrates your reliability and skill in passport photo editing.
Marketing Your Editing Services
Market your services through social media, a professional website, and networking. Highlight your expertise in passport photo editing and compliance. Offer competitive pricing and quality guarantees to attract clients.
Networking with Potential Clients
Network with potential clients through professional platforms and industry events. Build relationships with photographers, travel agencies, and visa consultants. Word-of-mouth referrals and positive reviews can expand your client base.
Final Checklist Before Submission
Ensuring All Requirements Are Met
Before submission, ensure the photo meets all requirements. Check the size, background, and quality. Verify the head size and position, and ensure no shadows or reflections.
Reviewing Final Edits
Review the final edits for compliance and quality. Double-check brightness, contrast, and color balance. Ensure the photo looks natural and meets official guidelines.
Double-Checking Dimensions and Sizes
Double-check the photo’s dimensions and sizes. Use a ruler or photo editing software to verify the measurements. Ensure the photo meets the specific requirements for the document.
Final Quality Check
Perform a final quality check before submission. Ensure the photo is clear, in focus, and free of blemishes. Verify the resolution and print quality if submitting a physical copy.
Preparing for Submission or Printing
Prepare the photo for submission by ensuring it meets all guidelines. Print the photo on high-quality paper or save it in the correct digital format. Submit the photo confidently, knowing it meets the required standards.
Frequently Asked Question about PassPort Photo
-
Is it okay to edit my own passport photo?
Yes, it’s okay to edit your passport photo as long as the edits do not alter your appearance and comply with the passport photo guidelines of your country. Avoid changes that distort facial features, such as resizing eyes or mouth.
-
How much does it cost to edit a passport photo?
Editing costs vary based on the software or service used. Many mobile apps offer free basic editing tools, while professional software like Adobe Photoshop requires a subscription. Costs can range from free to over $20 for advanced editing features.
-
What are the requirements for a passport photo?
Passport photos must be 2×2 inches, taken within the last 6 months to reflect your current appearance, with a white or off-white background. The photo should show your full face, front view with a neutral expression, and both eyes open. Headgear worn for religious purposes is allowed if it does not cover the face.
-
How to edit the background of a passport photo?
Use photo editing software with a background removal tool, such as Photoshop’s ‘Quick Selection Tool’ to select and delete the existing background. Then, add a solid color layer (usually white or off-white) behind your photo to meet passport requirements.
-
How to resize a photo for passport size?
Most photo editing apps and software have a crop tool that allows you to select preset dimensions or manually enter the required size of 2×2 inches (51x51mm) for passport photos. Ensure the head size is correctly proportioned within the image frame according to guidelines.
-
How to remove red-eye from a passport photo?
Use the red-eye removal tool available in most photo editing software and apps. This tool automatically detects and corrects red eyes without altering the rest of the image.
-
How to edit lighting in a passport photo?
Adjust the brightness and contrast settings in your editing software to ensure the photo is well-lit without harsh shadows or overexposure. Aim for a balanced, natural look that clearly shows your face.
-
Can I wear glasses in my passport photo?
As of the latest guidelines, wearing glasses in passport photos is not allowed due to glare and reflection issues. If you must wear glasses for medical reasons, you may need to provide a signed note from a medical professional.
-
How to edit a passport photo on iPhone?
Use the built-in Photos app for basic edits like cropping and adjusting lighting. For more advanced editing, such as background removal or blemish editing, consider downloading third-party apps like Adobe Lightroom Mobile or Passport Photo Booth.
-
How to edit a passport photo on Android?
Android users can utilize the Gallery app for basic cropping and adjustments. For more detailed editing, apps like Photoshop Express or Passport Photo ID Maker offer a range of tools designed to fine-tune your passport photo to meet specific requirements.
-
What size should my passport photo be?
The standard size for a passport photo is 2×2 inches (51x51mm), with the head height between 1 -1 3/8 inches (25-35mm) from the bottom of the chin to the top of the head.
-
What should I wear in my passport photo?
Wear clothing that you normally use on a daily basis. Uniforms, clothing that looks like a uniform, and camouflage attire should be avoided. Religious clothing is acceptable if worn daily.
-
Can I smile in my passport photo?
No, you should have a neutral facial expression with both eyes open and mouth closed. Smiling, frowning, or any exaggerated facial expressions are not allowed.
-
Can I edit blemishes out of my passport photo?
Minor blemishes can be edited out as long as the edits do not significantly alter your appearance. However, it’s important to ensure that the photo accurately reflects your natural appearance to avoid issues with identification.
-
Where can I print a passport photo?
Passport photos can be printed at most photo printing services, including drugstores, photo studios, and online photo service providers. Ensure the print quality and paper type meet the passport photo requirements of your country.
-
How long does it take to edit a passport photo?
The time it takes to edit a passport photo can vary from a few minutes to several hours, depending on the extent of the edits and your familiarity with the editing tools. Simple adjustments like cropping or lighting can be done quickly, while more complex edits may take longer.
-
What happens if my passport photo is not edited correctly?
If your passport photo does not meet the required standards, your passport application may be delayed or rejected. Ensure you follow the guidelines closely and consult with photo professionals if unsure.

Photo Editing for TikTok Shop Sellers: What Works in 2026
📂 Categories 🛒 Ecommerce Business 📸 E-commerce Photo Tips 🖼️ Platform Image Req. 📦 Amazon…

“Why Your Ecommerce Store Needs Professional Photo Editing”
📂 Categories 🛒 Ecommerce Business 📸 E-commerce Photo Tips 🖼️ Platform Image Req. 📦 Amazon…
eBay Product Photo Requirements 2026: The Complete Seller’s Checklist
📂 Categories 🛒 Ecommerce Business 📸 E-commerce Photo Tips 🖼️ Platform Image Req. 📦 Amazon…

Drop Shipping Product Photos: How to Stand Out When Competitors Use the Same Images
📂 Categories 🛒 Ecommerce Business 📸 E-commerce Photo Tips 🖼️ Platform Image Req. 📦 Amazon…

AI vs Manual Photo Editing for Ecommerce: Which Delivers Better ROI?
📂 Categories 🛒 Ecommerce Business 📸 E-commerce Photo Tips 🖼️ Platform Image Req. 📦 Amazon…
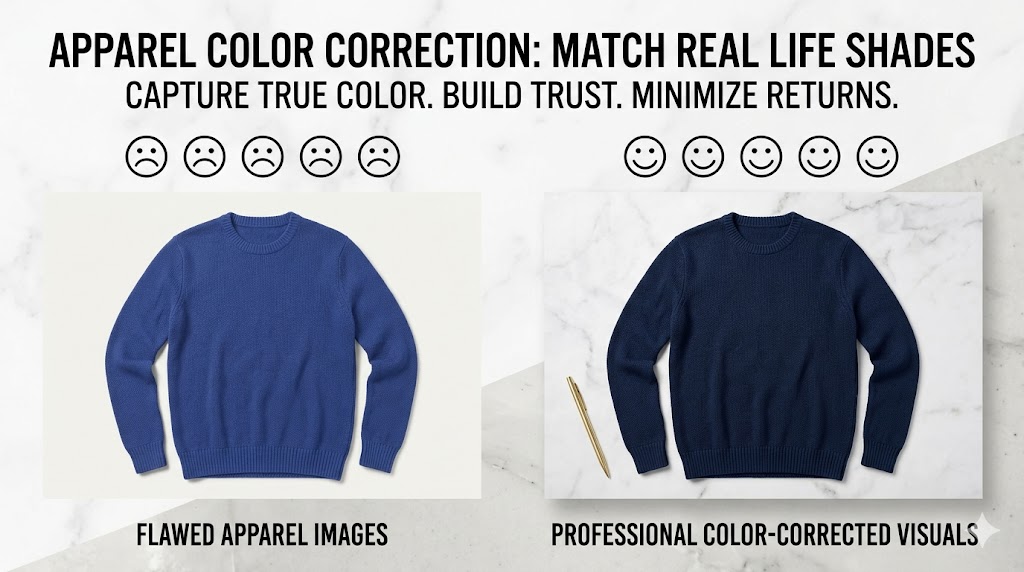
Color Correction for Apparel Photos: Match What Customers See in Real Life
📂 Categories 🛒 Ecommerce Business 📸 E-commerce Photo Tips 🖼️ Platform Image Req. 📦 Amazon…
LET’S COLLABORATE TO ENHANCE YOUR PHOTO
OUR ECOMMERCE PHOTO EDITING SERVICES READY FOR YOU!
Get the Awesome Quote!
One of the most important things is to pick the best professional ecommerce photo editing services company.
Quick Peek at Our Quality!
Every issue that arises will be explained in detail. It’s time to start planning your adventures with our ecommerce photo editing service.